Melting Snowmen Cookies
Adorable melting snowmen cookies are the perfect cookies for your holiday cookie exchanges and for Santa!
You guys today you get to see my super awesome mad skills in cookie decorations. Wait, who am I kidding, cookie decorating is not my thing. But luckily, it doesn’t have to be because it is all about the thought and the season of sharing! Right?
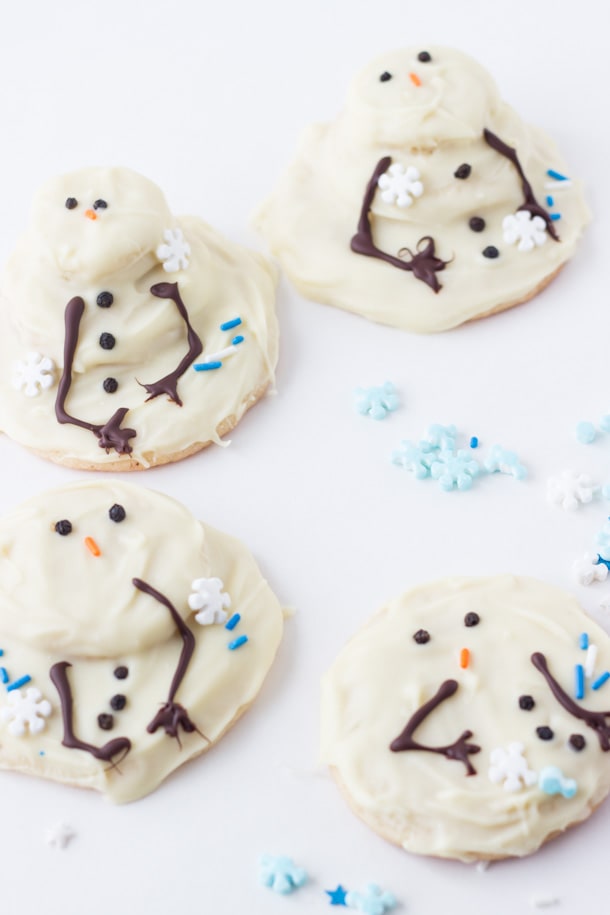
Thank goodness Betty Crocker has it all figured out and it’s my go-to source for doable inspiration when it comes to holiday cookie decorating ideas! I saw this easy melting snowmen cookies idea and I wanted to give it a try immediately. Aren’t these melty snowmen cookies adorable? I love how easy they are to make and best of all, perfect for the holiday season. I am sure Santa would love these 🙂
Starting with a Betty Crocker sugar cookie mix, you make two different sizes of the moist chewy cookies. Stack together and pour some melted white chocolate on them and you have yourself some melty snowmen cookies. Bring the kids in to stack and decorate these cookies for the holidays, for Santa and for any cookie exchange party you may still have to attend!

For more ideas to #getyourbettyon, check out Betty Crocker “Christmas Cookies with Kids” Hub!

Melting Snowmen Cookies
Adorable melting snowmen cookies are the perfect cookies for your holiday cookie exchanges and for Santa!
Ingredients
- 1 pouch (1 lb 1.5 oz) Betty Crocker™ sugar cookie mix
- ½ cup unsalted butter, softened
- 1 large egg
- 1 package (1 lb) vanilla-flavored candy coating (almond bark)
- Black confetti candy sprinkles
- Orange jimmies candy sprinkles
- Betty Crocker™ Decorating Cookie Icing chocolate icing
- Betty Crocker™ Decorating Decors snowflakes
Instructions
- Preheat oven to 375 degrees F. Line a cookie sheet with parchment paper.
- In a medium bowl, combine the sugar cookie mix, butter and egg. Mix until soft dough forms.
- Divide dough into two halves. Roll one half of dough into 1 tablepoon-size balls and place on cookie sheet. Flatten these balls slightly. Roll the other half of the dough into marble-sized balls. Do not flatten these.
- Bake cookies for 7-9 minutes or until the edges are golden brown. Let cookies cool on pan for 5 minutes. Move to cooking rack and cool completely.
- Melt the candy coating in a microwave safe bowl and stir until smooth.
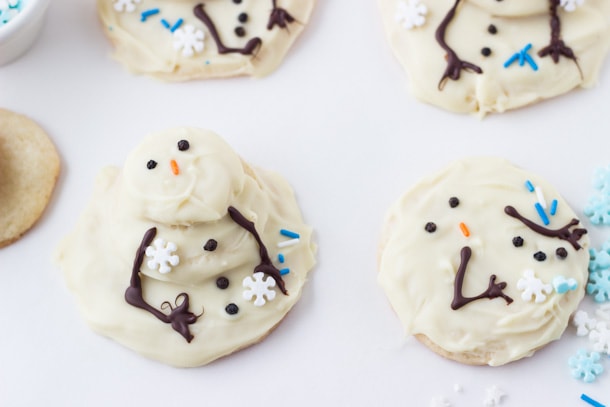
- Place a dot of melted coating on bottom of a small cookie and place it toward one edge of a larger cookie. Spoon coating over entire cookie, allowing some to spill over edge of bottom cookie.
- Place two black confetti pieces on small cookie for eyes, and an orange candy sprinkle in center for a carrot nose. Place three black confetti sprinkle “buttons” on the bottom cookie. Alternatively, you can decorate one large cookie in the same manner, to represent a completely melted snowman.
- Use the cookie icing to draw on arms. Sprinkle with snowflakes; allow to dry completely before Storing cookies in an airtight container.
Are you ready to #getyourbettyon? For more easy and creative holiday cookie recipes, visit Betty Crocker
Facebook: https://www.facebook.com/bettycrocker
Twitter: https://twitter.com/BettyCrocker
Pinterest: https://www.pinterest.com/bettycrocker/
YouTube: https://www.youtube.com/user/BettyCrockerTV
Brand Website: www.bettycrocker.com
Brand Hub: www.BettyCrocker.com/KidsCookieCorner
This is a sponsored conversation written by me on behalf of Betty Crocker . The opinions and text are all mine.
Z, I Love these!!! what a great idea and so cute!!!
You may claim to not have cookie skillz, but the evidence would suggest otherwise. These are awesome!