Instant Pot Cherry Cheesecake
Hey there friends. Times are changing which means technology is always evolving and making a lot of the tedious jobs we do daily easier to manage. As a baker, I am truly loving all the new gadgets and gizmos that have been rolling out in the past decade.
One of my all-time favorites is the instant pot. If you have one, tell me it hasn’t saved you SO MUCH time and effort when trying to prep and plans family meals. Instead of slow cooking for what seems like a lifetime, you can have a healthy meal within an hour from prep to serve. These are a lifesaver in the kitchen, but have you ever used one for baking and not just savory meals?
If you have never baked in an Instant Pot then maybe start with this Instant Pot Cherry Cheesecake recipe.
You read that right, you can even make a cheesecake in your instant pot! I’m sure you are picturing a sloppy mess and wondering how the heck a beautiful crust can come from an instant pot. Well, the instant pot makes it easier to create your amazing filling while the crust is set and the topping is perfectly caramelized. Multitasking at its best.
Let’s run through this Instant Pot Cherry Cheesecake recipe.
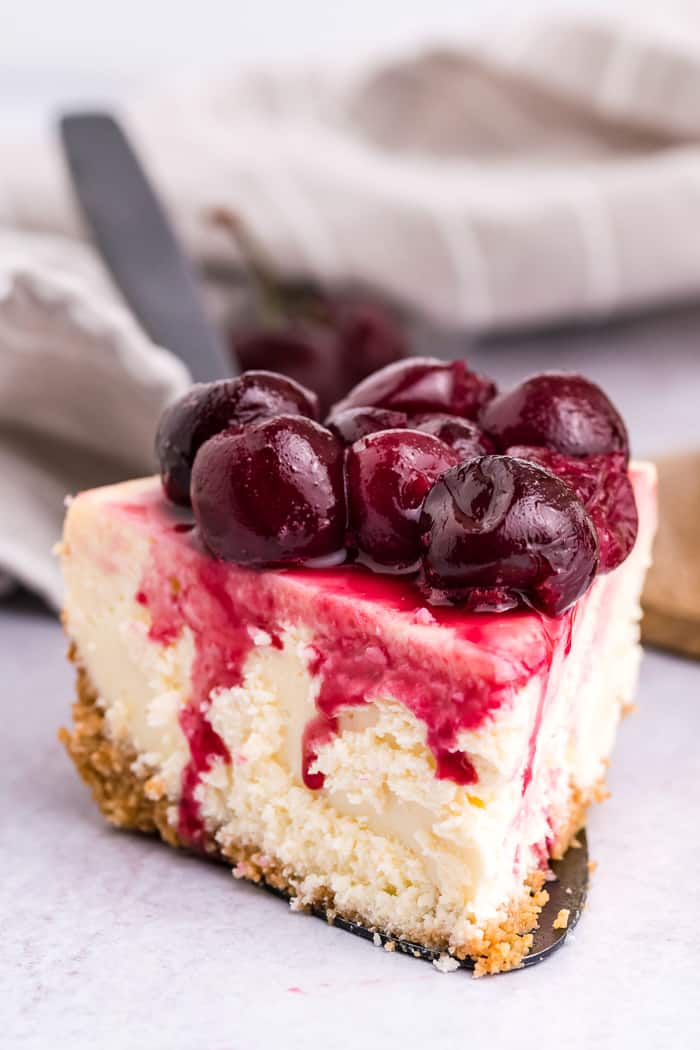
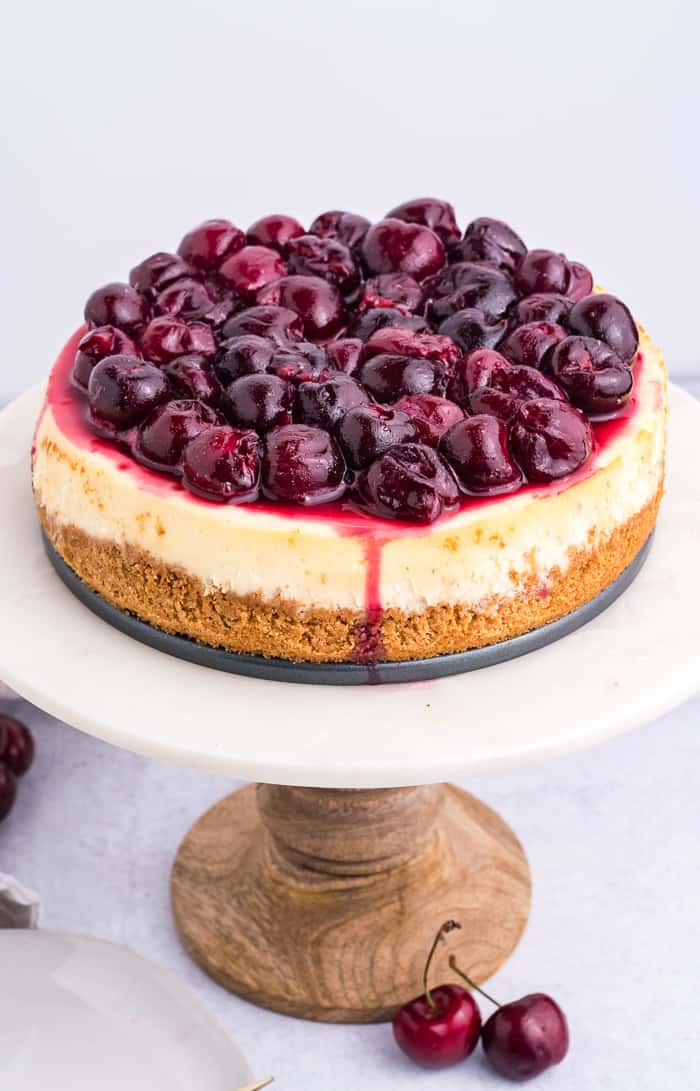
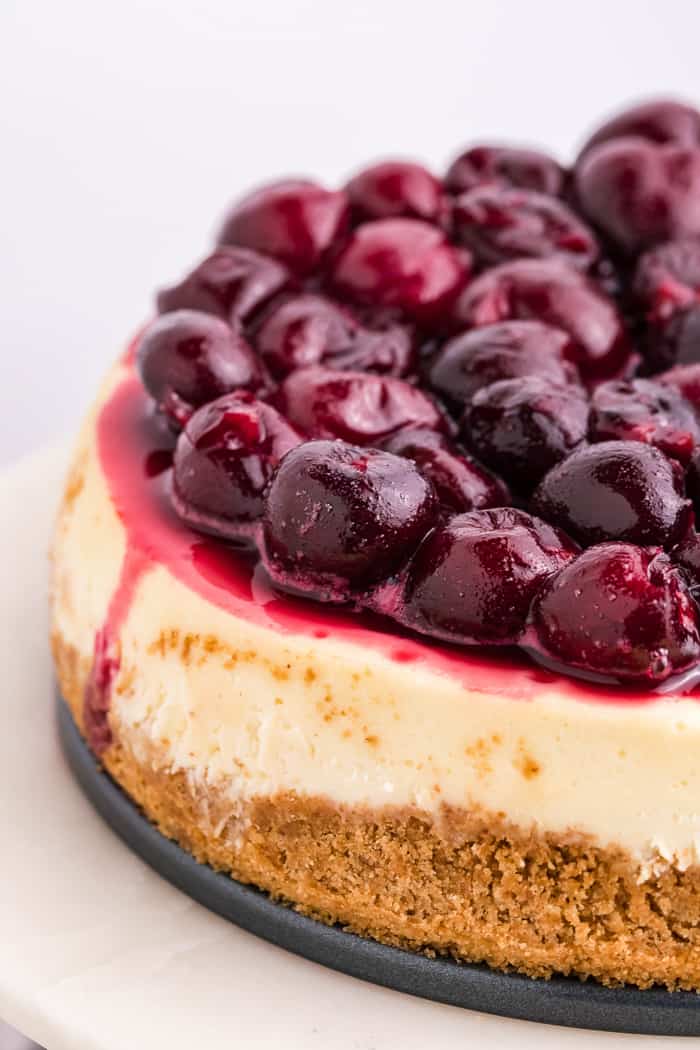
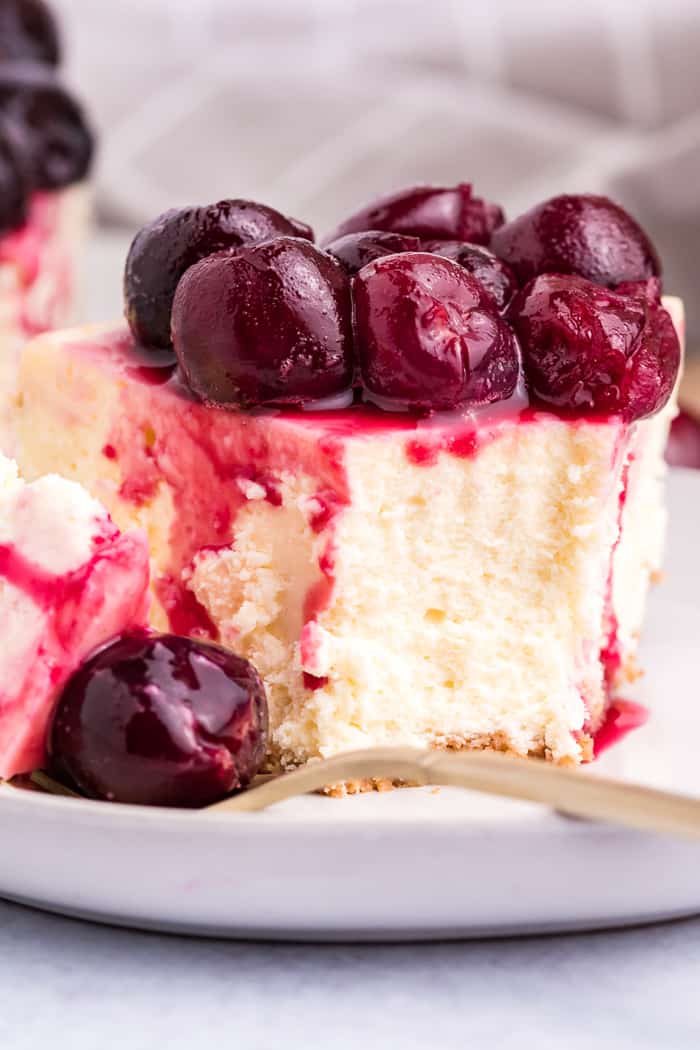
While the cheesecake itself is baked in the instant pot, the crust is baked old-fashioned way 🙂 It takes 7 minutes so it is not exactly time-saving to do this any other way. This cheesecake has a traditional graham cracker crust. Buttery and crunchy.
For the batter, we mix that up with an electric mixer. Tangy cream cheese, heavy cream, and vanilla extract all come together for a rich batter. This all gets poured into the baked crust.
To bake in the instant pot, cover the cheesecake with foil. Add some water to the bottom of the instant pot and set the cheesecake pan in the instant pot. That’s it! You bake your cheesecake and it comes out perfectly. One cooled, refrigerate and enjoy the next day.
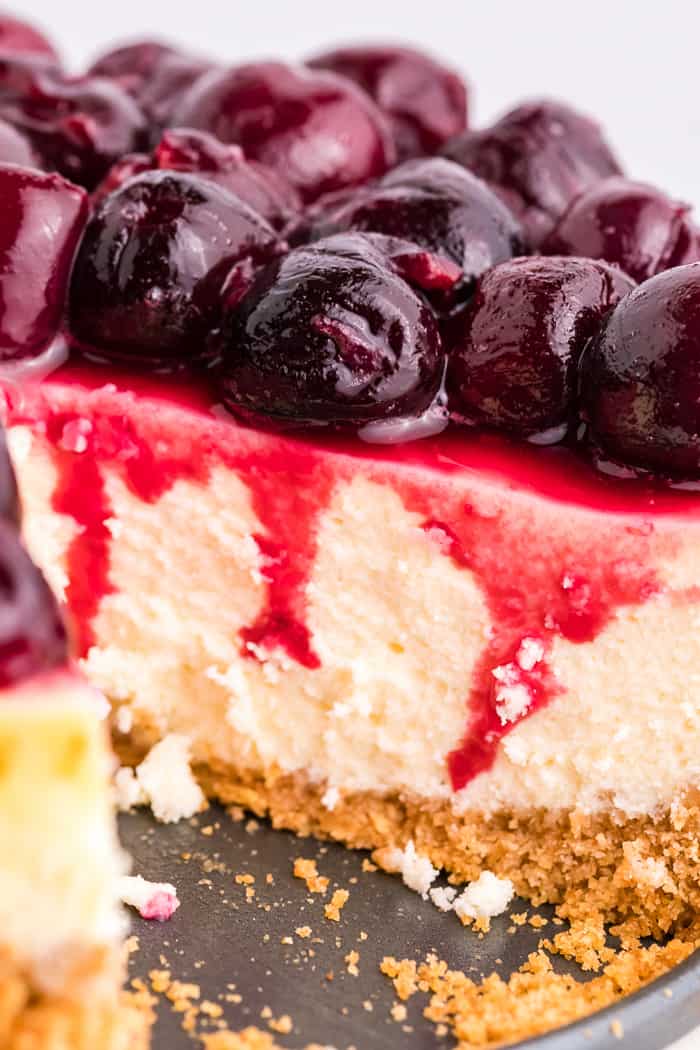
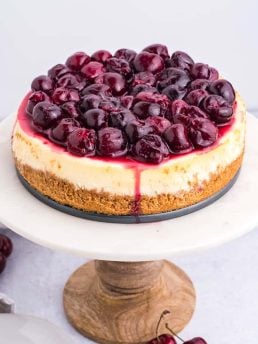
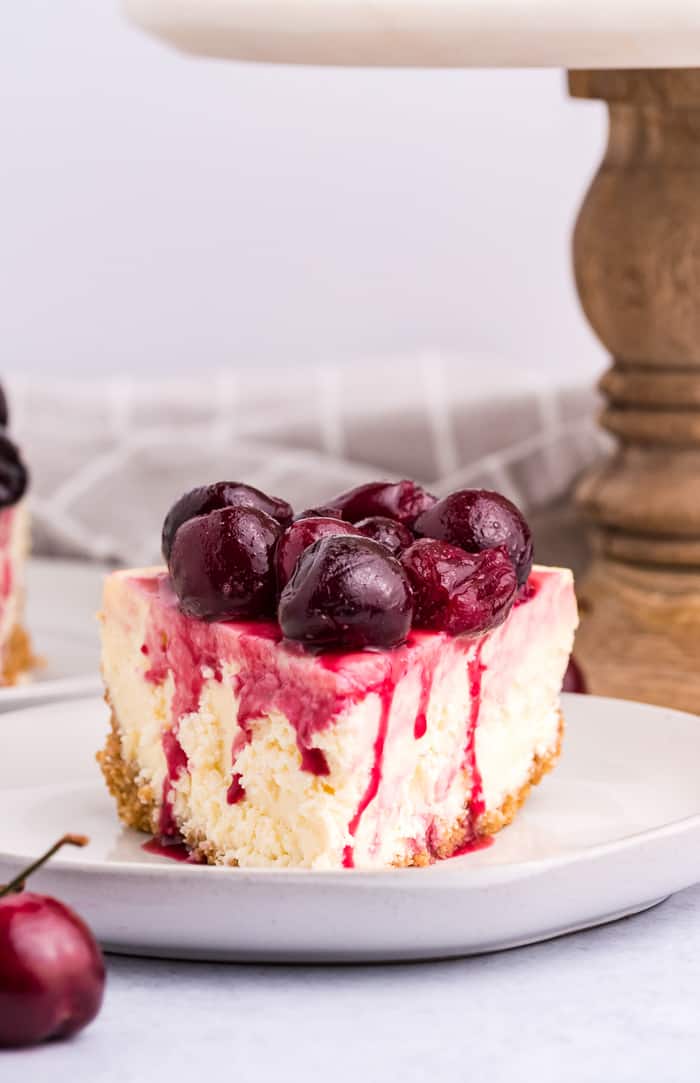
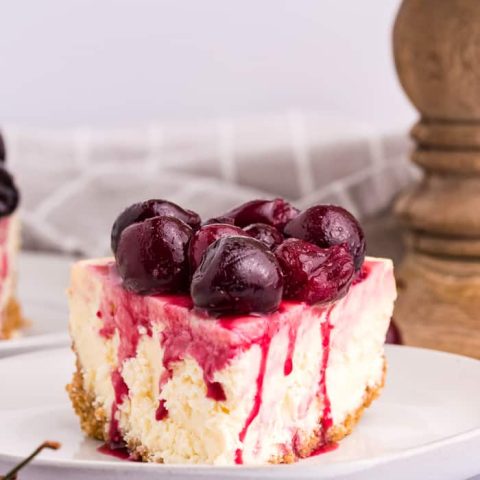
I chose cherries for the topping for this version but feel free to use any fruit topping you like! Cherries are vibrant but can be slightly tart. So when you boil them down with sugar it helps to balance the flavors and bring more sweetness to your cheesecake. I have to make this in secret or my kids will steal all my cherries before I can make the sauce.
Fresh cherries are in season from spring to the end of fall so you have plenty of opportunities to make this Instant Pot Cherry Cheesecake and share it with friends and family. What better way to ring in spring than with sweet cherries?
If you love this beautiful fruit, then make sure to check out my other cherry recipes.
What do you think of this recipe? I love hearing your feedback and how your loved ones thought of your creation.
If you share across social media make sure to tag #aclassictwist so I can see your amazing cheesecake come to life :-).
As always my friends, Happy Baking 🙂
If you love this cheesecake you’ll love my coconut cheesecake too!
Instant Pot Cherry Cheesecake
This Instant Pot Cherry Cheesecake is a delicious and bubbly traditional cheesecake topped with a cherry glaze and hints of almond.
Ingredients
Crust
- 1 1/2 cups graham cracker crumbs
- 4 tablespoons butter, melted
Filling
- 2 8 ounce packages cream cheese room temperature
- 1/2 cup granulated sugar
- 2 tablespoons flour
- 1 teaspoon pure vanilla extract
- 1/2 cup heavy whipping cream
- 2 large eggs, at room temperature
Cherry Topping:
- 2 cups fresh cherries washed and pitted
- 1/4 cup granulated sugar
- 1/4 cup water
- 1 tablespoon cornstarch- dissolved in 1 tablespoon of water
- 1/2 teaspoon almond extract
Instructions
Crust
- Preheat your oven to 350 degrees/F.
- Add graham crackers to a food processor until you get about 1 1/2 cups of crumbs. Add in the melted butter and pulse until combined.
- Pour into the bottom of a greased 7″ springform pan and use your hand or the back of a spoon to press and form a crust bringing the crumbs up about 1 inch on the sides.
- Bake the crust for 10 minutes or until golden. Remove and cool on a wire rack.
Filling
- In the bowl of a stand mixer (or use a hand mixer) with a paddle attachment, cream the cream cheese for 3-4 minutes or until completely smooth and there are no lumps.
- Slowly pour in the sugar and flour and mix until just combined.
- Add vanilla extract and heavy cream and mix at low speed until combined. Slowly increase the speed to high for about 1 minute,
- Scrape the sides and bottom of the bowl and make sure there are no lumps. Give one final mix before adding the eggs.
- Add the eggs one at a time and mix just until the yolk disappears into the batter.
- Pour the batter into the prepared crust and gently tap the bottom of the pan on the counter to release any air bubbles.
- Cover the pan completely with aluminum foil. Add one cup of water into the inner pot of your Instant Pot and add in the trivet,
- Place the cheesecake on top of the trivet and set your pot to high pressure for 40 minutes and allow to naturally release.
- Once you can open the pot, remove the cheesecake, and allow it to cool to room temperature on a wire rack.
- Place the cheesecake in the refrigerator to set for at least 6 hours but overnight is recommended.
Topping
- Add the cherries, sugar, into a medium saucepan and heat over medium heat until boiling. Reduce heat and simmer for 5-6 minutes or until the cherries are soft.
- Reduce heat to medium-low and add in the cornstarch slurry and whisk until combined. Whisk until the sauce thickens slightly. About 2 minutes.
- Remove from heat and add in the almond extract. Allow cooling completely.
- Once the cheesecake is set, pour the cherry sauce over the top and serve.
- Store any leftover cheesecake in the refrigerator for up to three days.
Recommended Products
As an Amazon Associate and member of other affiliate programs, I earn from qualifying purchases.