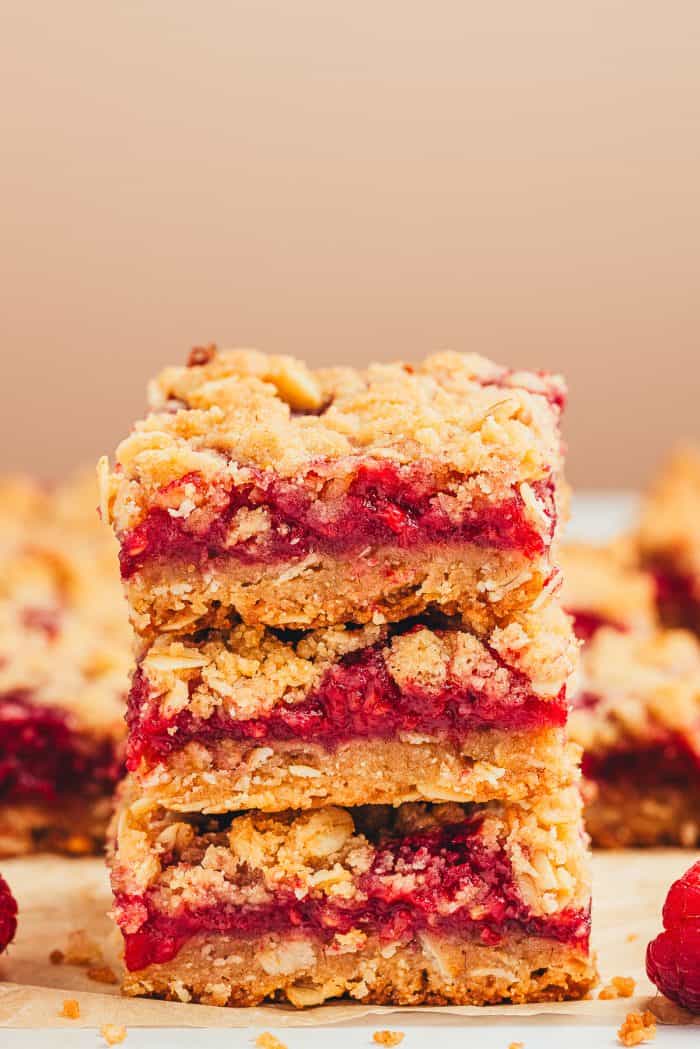
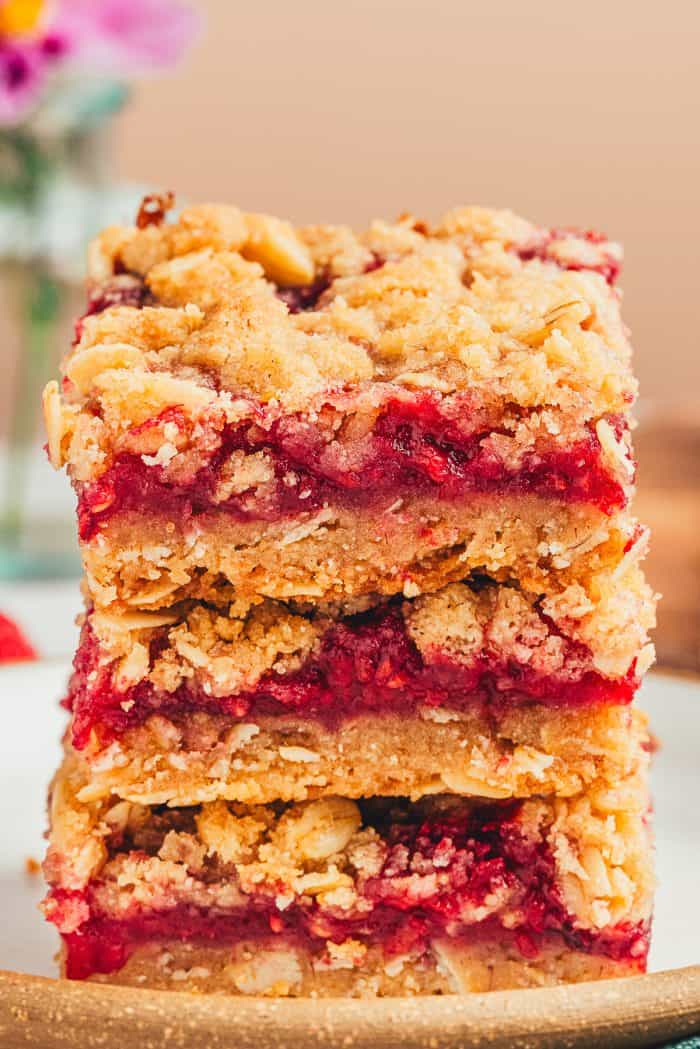
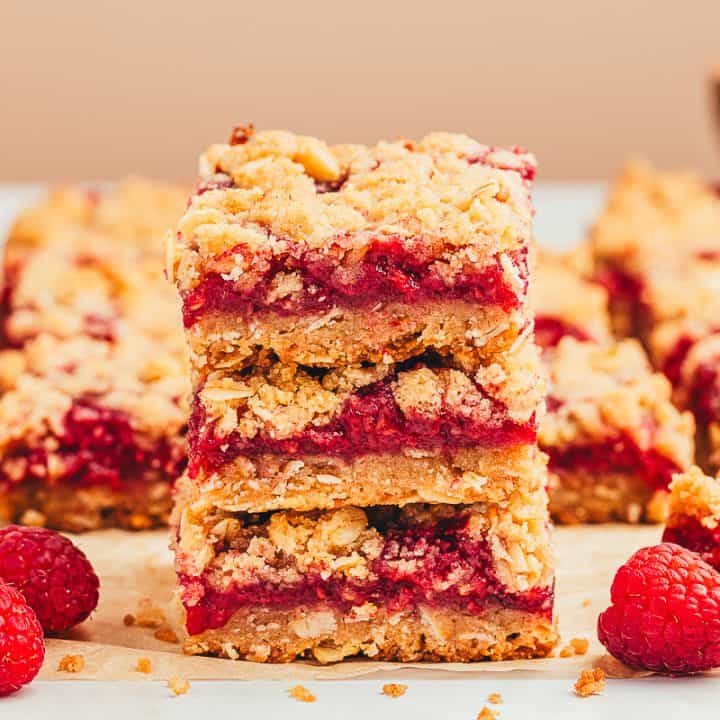
Raspberry Crumble Bars
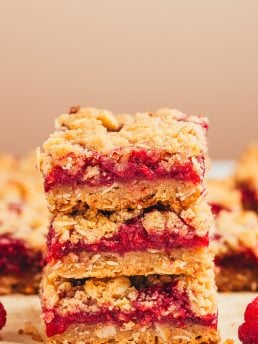
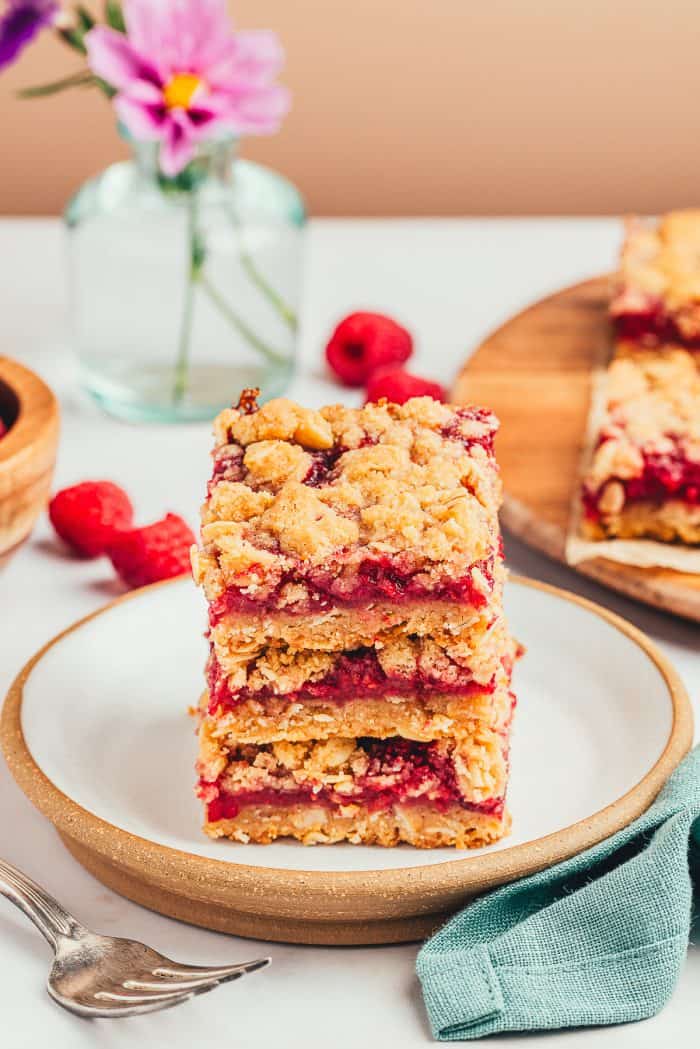
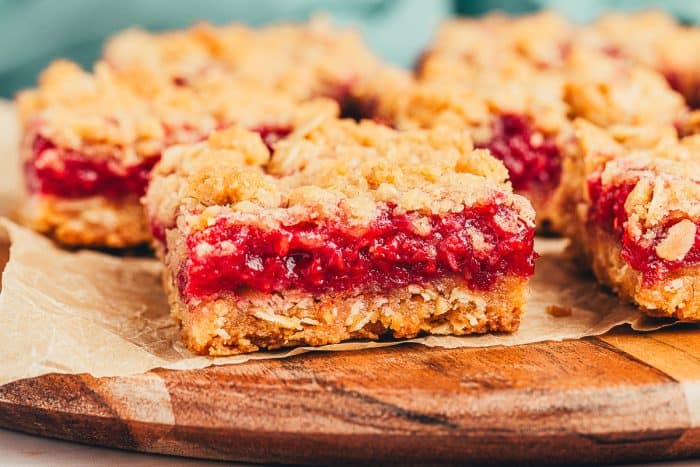
These raspberry crumble bars are soft, buttery, and bursting with sweet-tart raspberry flavor! A jammy raspberry filling flavored with vanilla and lemon is sandwiched between a sweet, cinnamon-spiced oat crumble. Thawed frozen raspberries make this dessert or snack possible any time of the year!
Hey there, and welcome back, friends.
You are in for a sweet treat!
Don’t you just love a good bar recipe? These bars check all the boxes! A jammy filling, crumbly buttery topping, and easy to make.
I think of these bars as a classic recipe that you should have in your recipe box. They’re very versatile. You can use any fruit in the filling. Blueberries, mixed berries, and strawberries all make great substitutes.
These bars will always be a hit at any gathering. They’re easy for you to whip up last minute and everyone always gobbles them up. I always get compliments when I serve these bars.
I love the simplicity of this recipe. You can use fresh or frozen raspberries; which is perfect because sometimes all you have is frozen fruit on hand.
The bar crust and crumble topping is made with flour, rolled oats, and almond flour. Almond flour can be replaced with all-purpose flour if needed. The crust and crumble topping will still be soft, buttery, and crumbly.
Ingredients

- all-purpose flour
- almond flour
- rolled oats
- brown sugar
- salt
- ground cinnamon
- unsalted butter
- frozen raspberries
- granulated sugar
- a lemon
- vanilla extract
How to Make Raspberry Crumble Bars
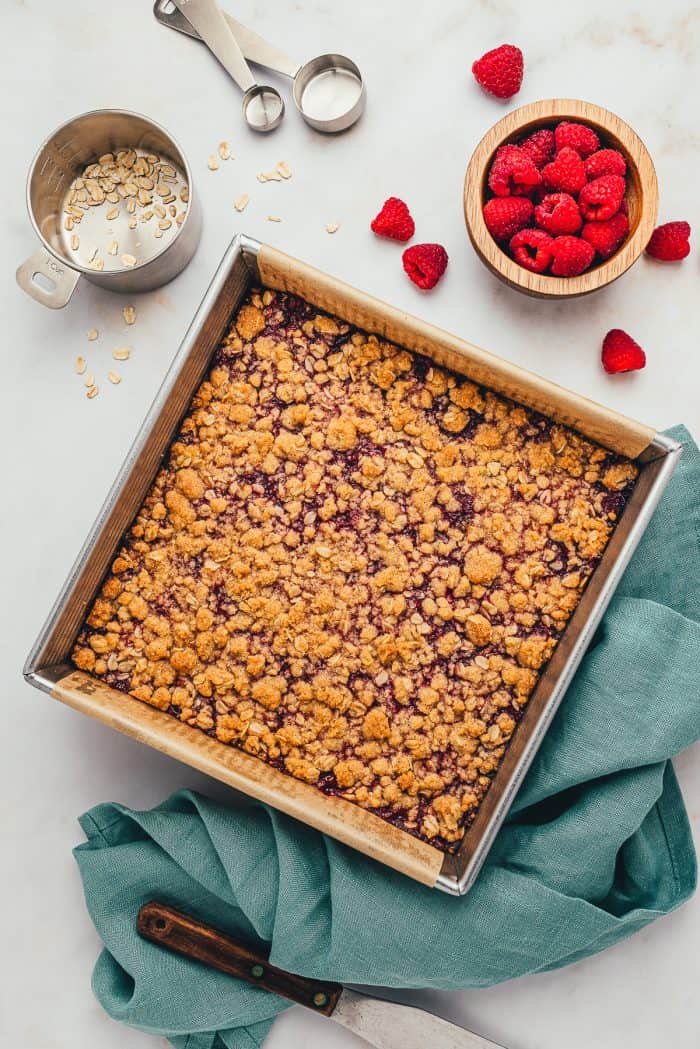
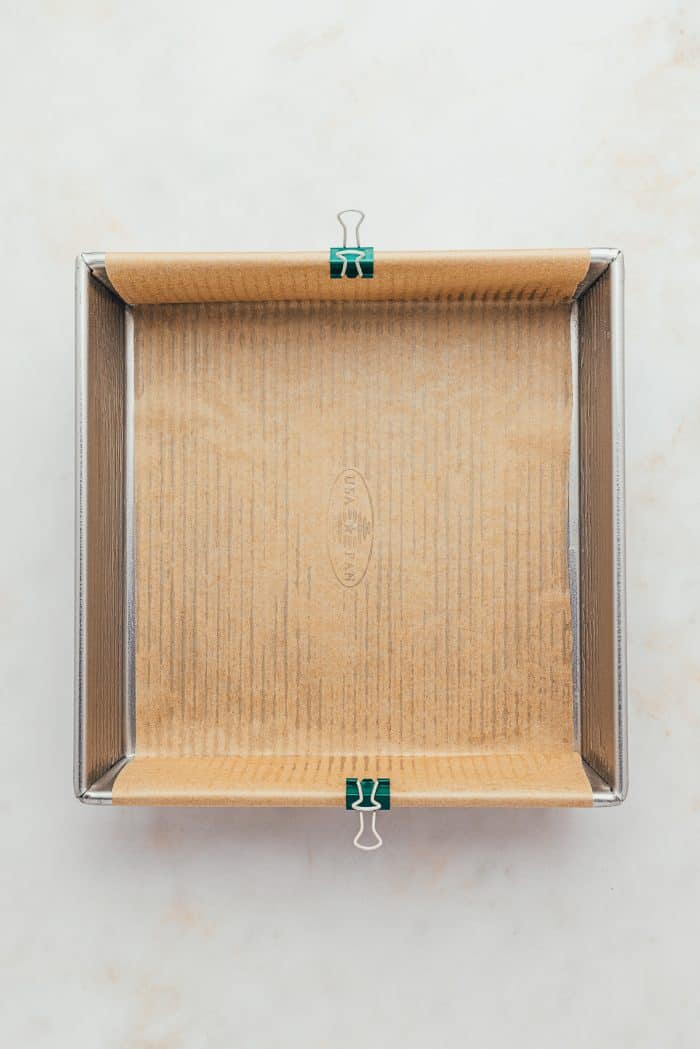
Preheat the oven and lightly grease a square baking pan with some of the melted butter then line it with parchment paper leaving an overhang. To keep the parchment paper secure while baking, you can use a binder clip on each side of the pan.
Mix the flours, oats, brown sugar, salt, and cinnamon in a large bowl.
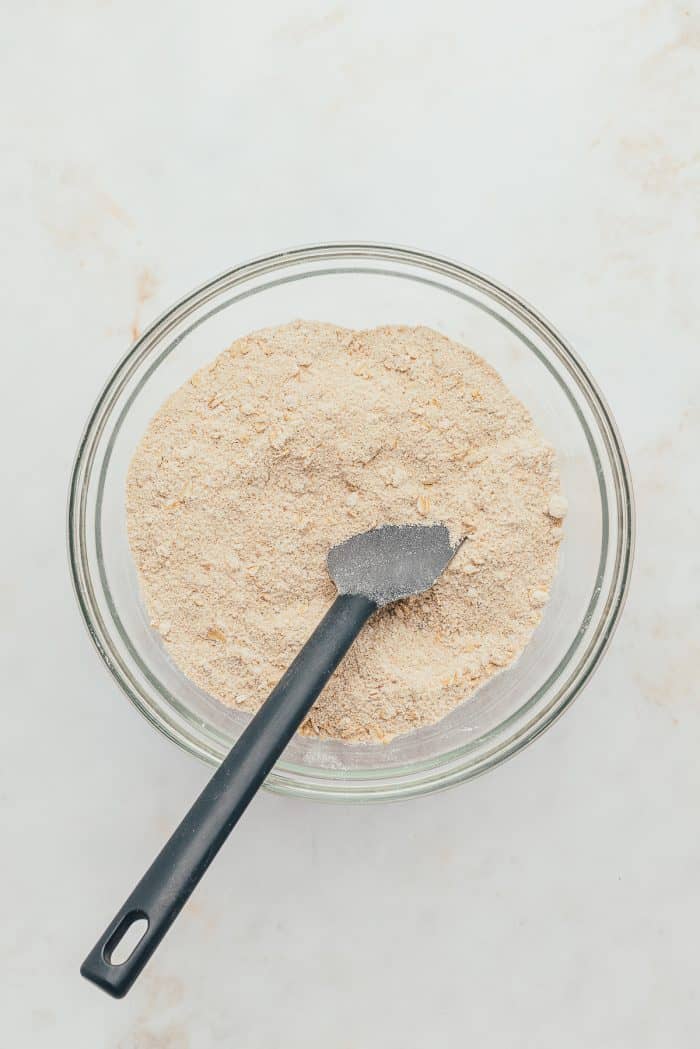
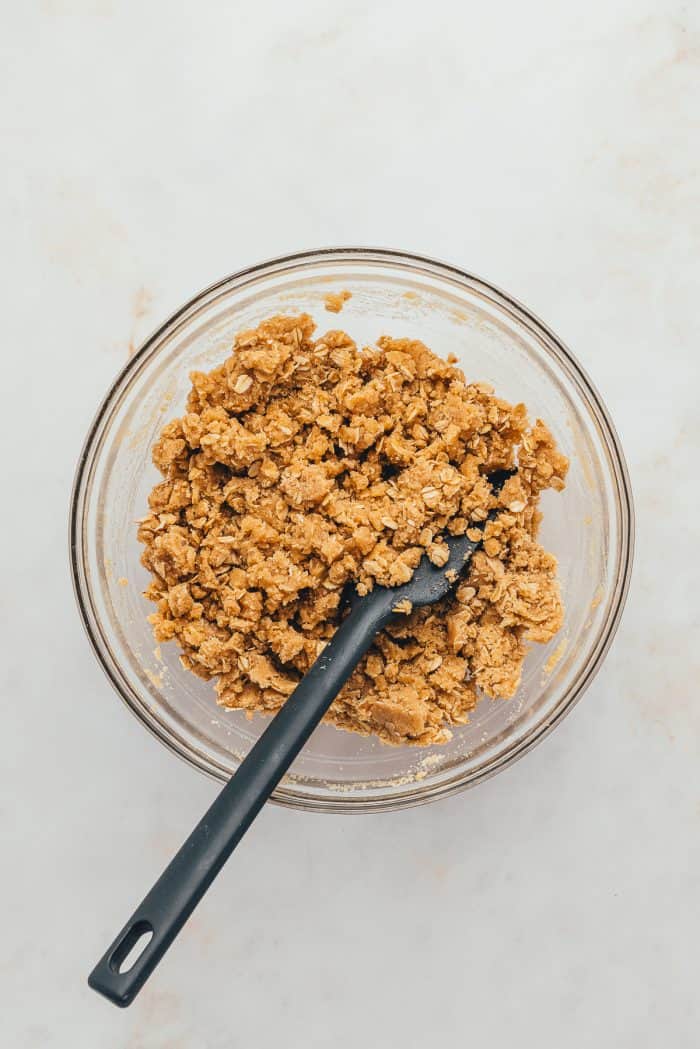
Add the melted butter and stir thoroughly until the mixture is moist and crumbly.
Press a third of the crumble mixture into your lined baking sheet in an even layer to form the crust. Reserve the remainder and set it aside.
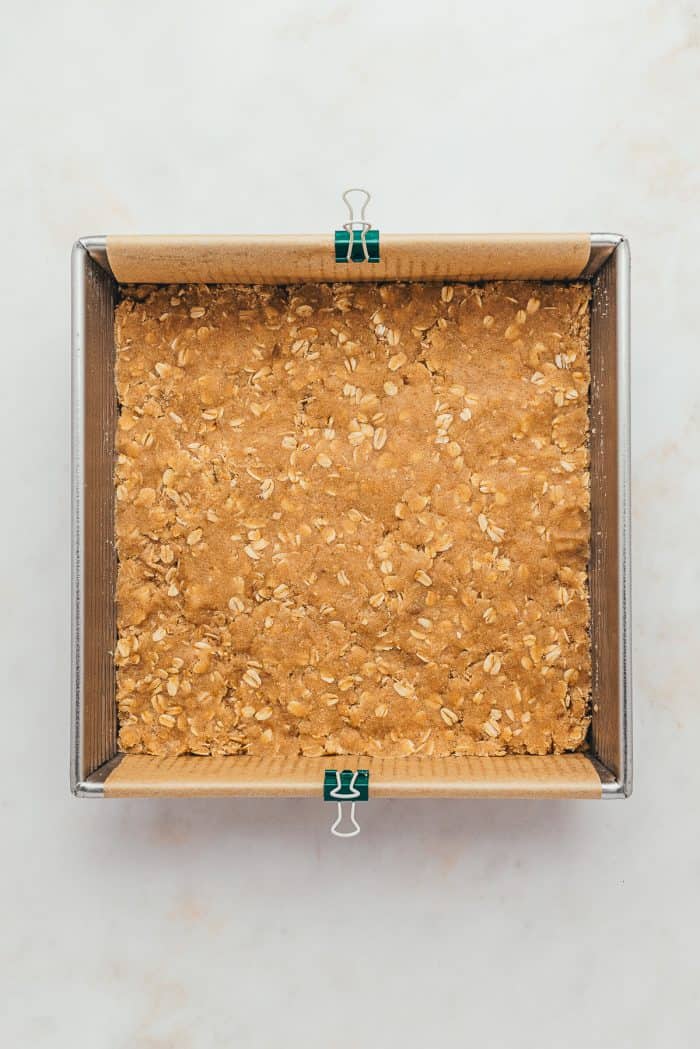
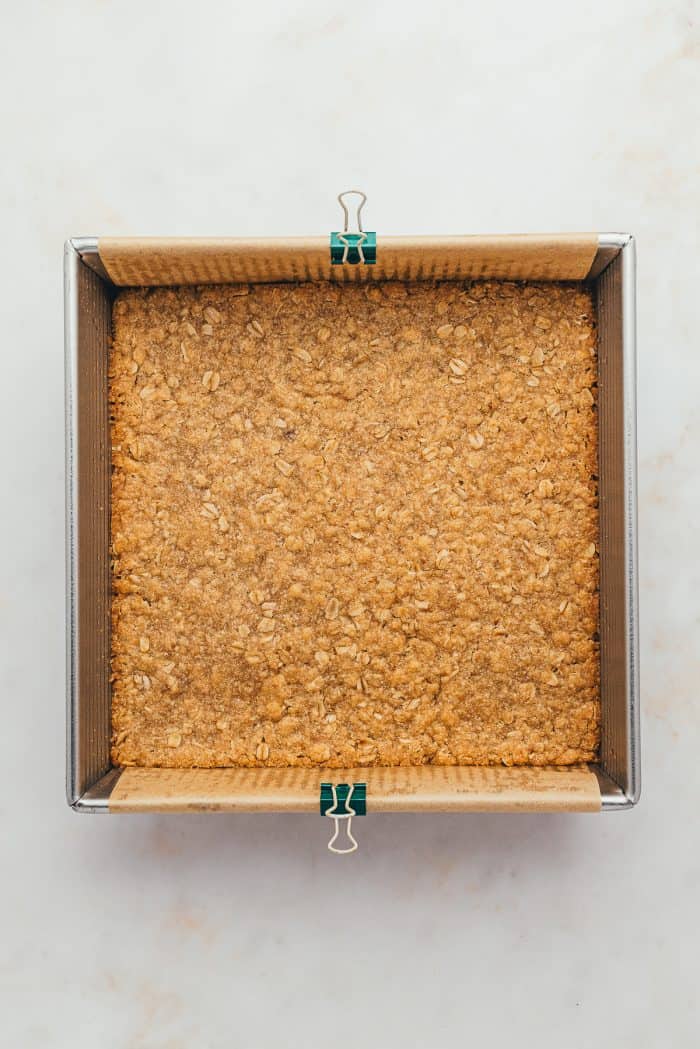
Bake the crust in the preheated oven for 15 minutes until it is just beginning to turn golden around the edges.
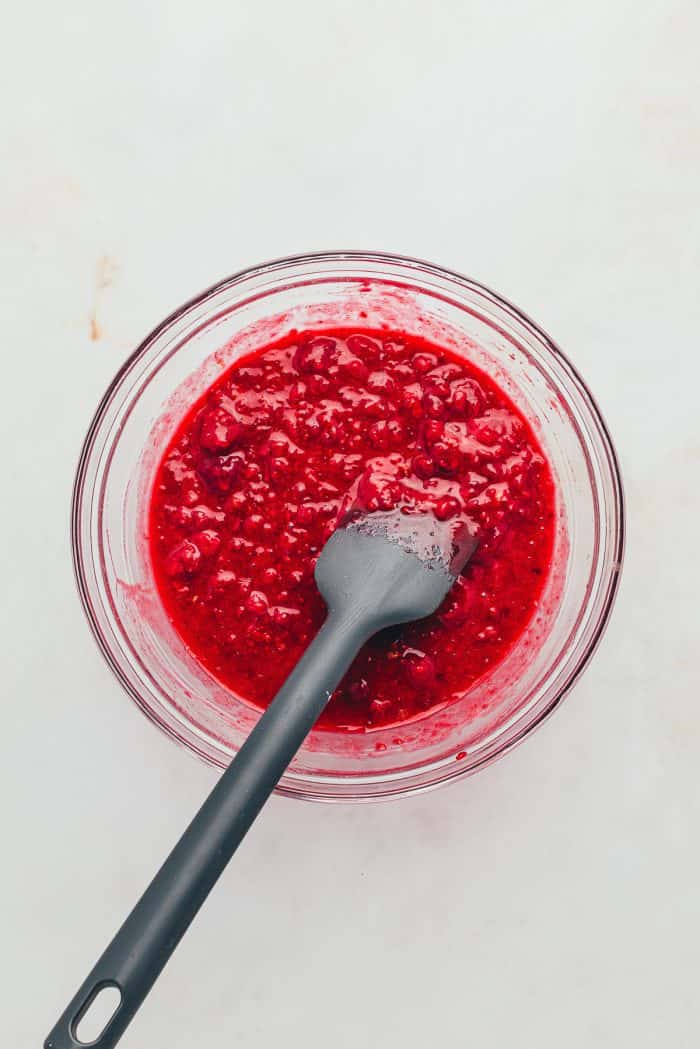
While the crust is baking, add the thawed raspberries to a bowl along with the rest of the filling ingredients. Mix well.
In order to allow enough time for the raspberries to thaw, place the bag on the counter at room temperature about an hour before you’d like to bake the bars. Or, you can place it in the refrigerator to thaw overnight.
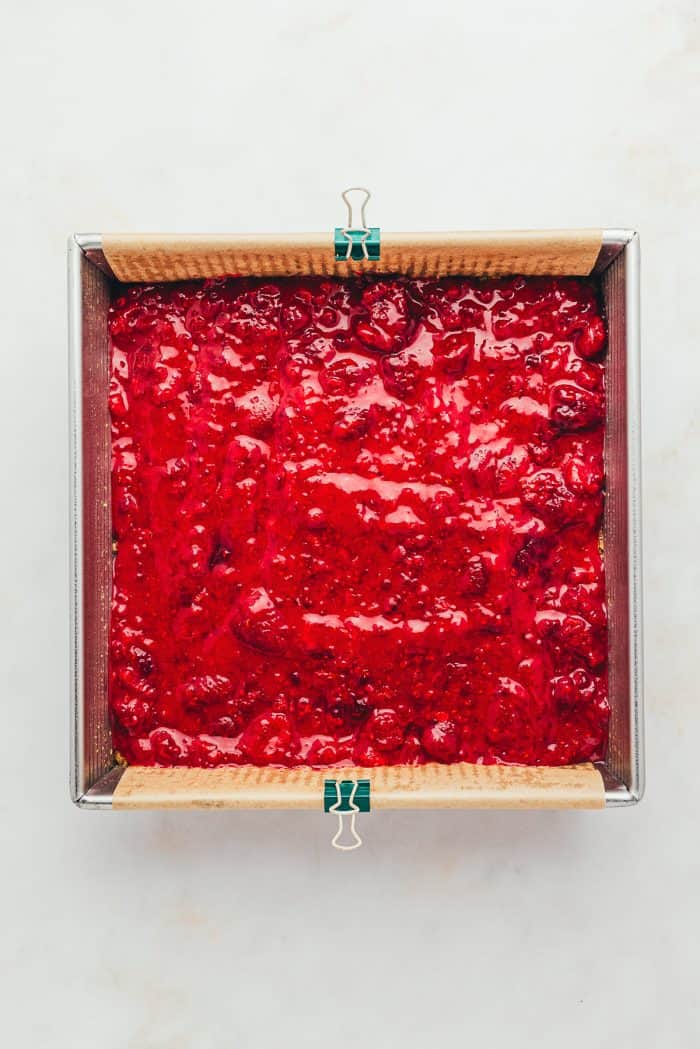
Spoon the raspberry filling over the baked crust in an even layer. It’s okay if the crust layer is still hot.
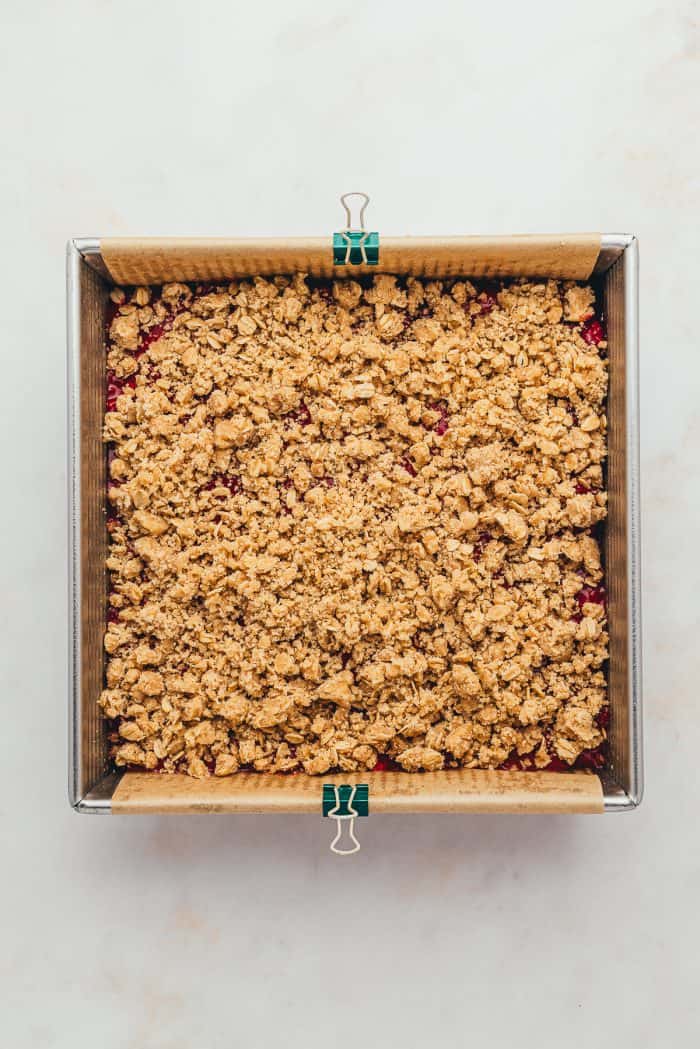
Sprinkle the remaining crumble mixture evenly over the top of the raspberry filling.
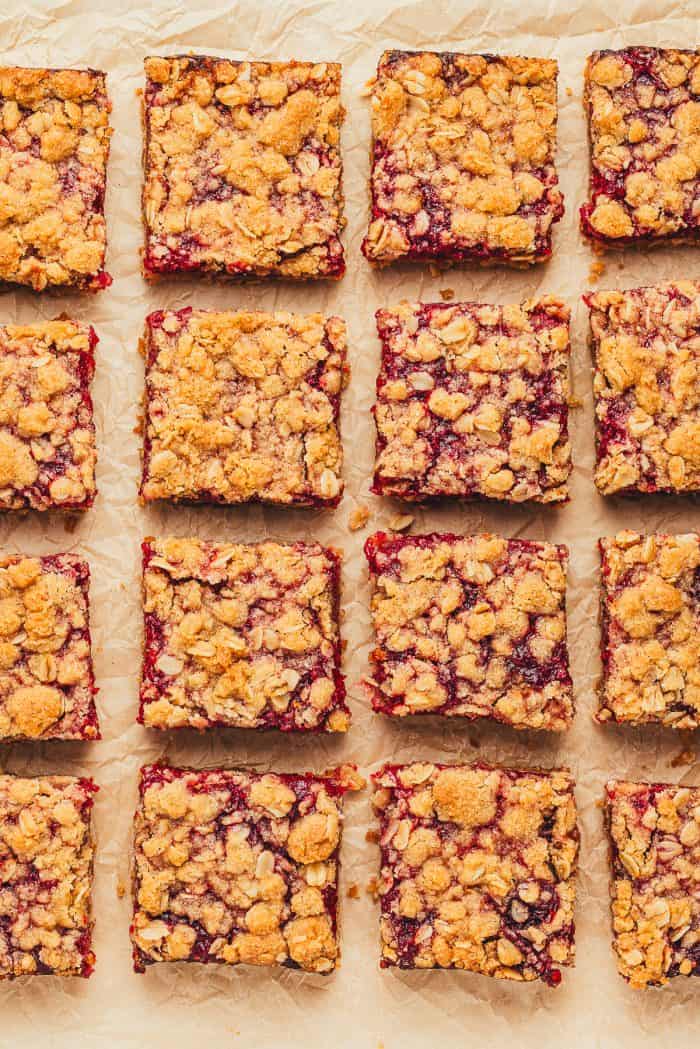
Bake the bars until golden brown and the raspberry juices are bubbling and have thickened.
Cool the bars for at least 1 hour.

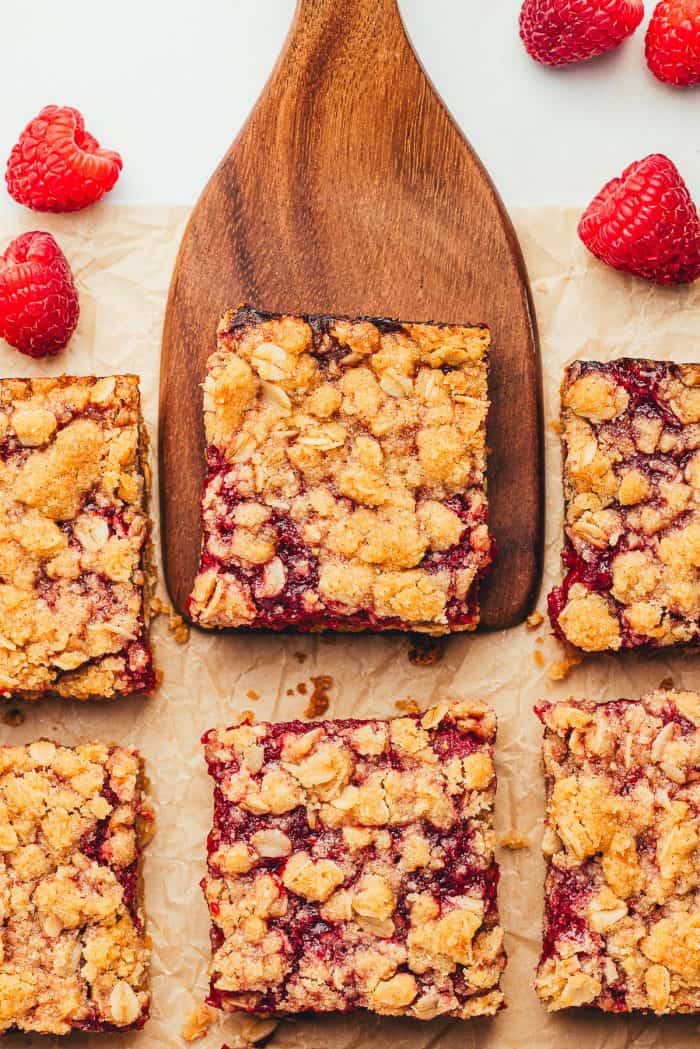
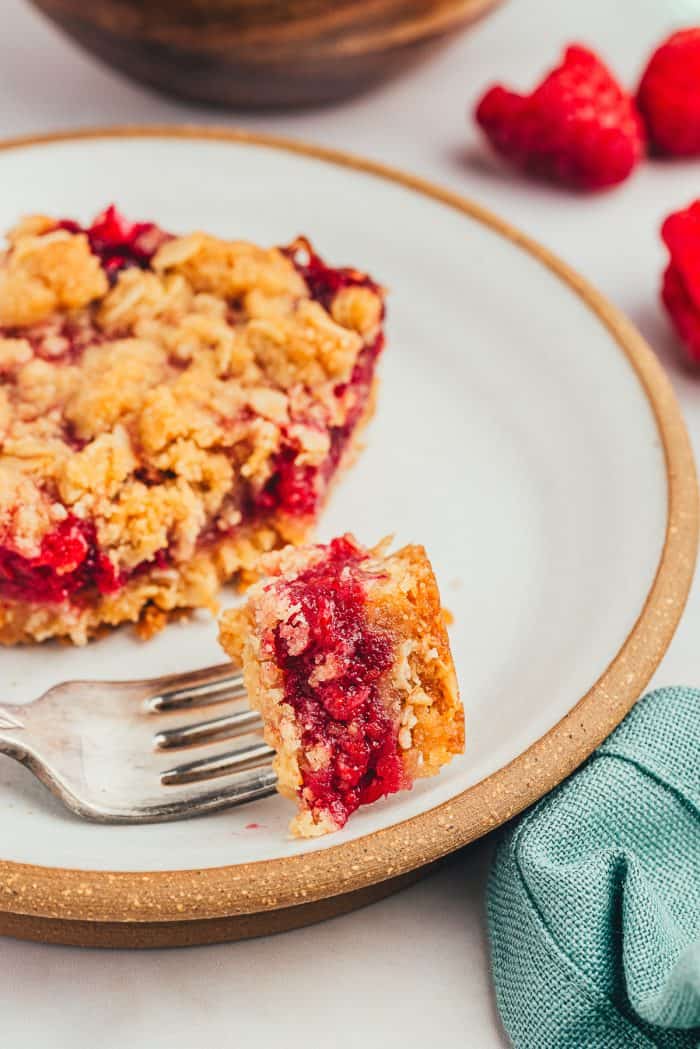
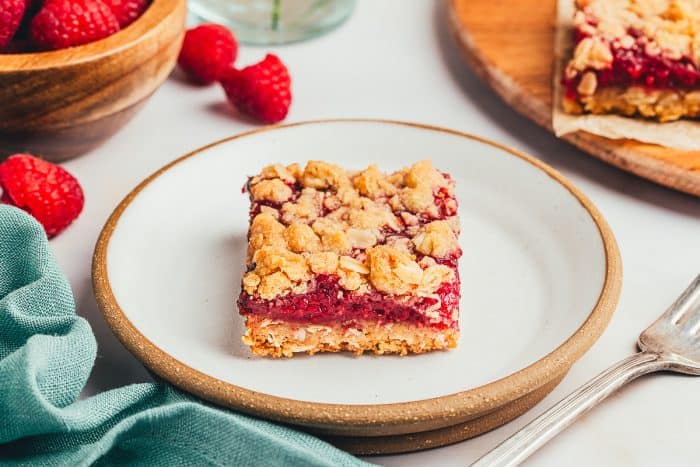
Use a butter knife or palette knife to gently loosen the edges then remove the bars from the pan using the parchment paper. Cut the bars into 16 equal squares before serving.
The cooling process is vital to the final texture of the bars, so don’t skip it! The raspberry layer will thicken as the bars cool. To hasten the cooling process, place the pan in the refrigerator.
How to Store
Leftover raspberry crumble bars can be stored in an airtight container in the refrigerator for up to 5 days. You can also freeze them for up to 3 months. Unthaw the bars on a plate at room temperature.
More Bar Recipes
- Raspberry Blondies
- Blueberry Crumb Bars
- Cherry Lime Cheesecake Bars
- Chewy Toffee Bars
- Salted Caramel Chocolate Chip Cookie Bars
What do you think of this amazing raspberry bar recipe? What would you serve with these bars? Let me know in the comment section below.
If you share across social media, make sure to tag #aclassictwist, so I can see your beautiful creation come to life!
Happy baking, friends!

Raspberry Crumble Bar Recipe
Raspberry Crumble Bars
These raspberry crumble bars are soft, buttery, and bursting with sweet-tart raspberry flavor! A jammy raspberry filling flavored with vanilla and lemon is sandwiched between a sweet, cinnamon-spiced oat crumble.
Ingredients
For the crumble:
- 1 ¾ cups all-purpose flour
- ½ cup almond flour
- 1 cup rolled oats
- 1 cup brown sugar, packed
- ½ teaspoon salt
- 1/2 teaspoon ground cinnamon
- 2 sticks (1 cup) unsalted butter, melted
For the filling:
- 12-ounce package frozen raspberries that have been thawed
- ⅓ cup granulated sugar
- 2 ½ tablespoons all-purpose flour
- Zest and juice of 1 small lemon
- 1 ½ teaspoons vanilla extract
Instructions
- Preheat the oven to 350 degrees. Lightly grease a 9-inch square baking pan with some of the melted butter then line it with parchment paper leaving an overhang.
- Mix the flours, oats, brown sugar, salt, and cinnamon in a large bowl. Add the melted butter and stir thoroughly until the mixture is moist and crumbly. Press ⅔ of the crumble mixture into your lined baking sheet in an even layer to form the crust. Reserve the remainder and set it aside. Bake the crust in the preheated oven for 15 minutes until it is just beginning to turn golden around the edges.
- While the crust is baking, add the thawed raspberries to a bowl along with the rest of the filling ingredients. Mix well.
- Spoon the raspberry filling over the baked crust in an even layer. It’s okay if the crust layer is still hot. Sprinkle the remaining crumble mixture evenly over the top of the raspberry filling.
- Bake the bars for 35-40 minutes until golden brown and the raspberry juices are bubbling and have thickened.
- Cool the bars for at least 1 hour. Use a butter knife or palette knife to gently loosen the edges then remove the bars from the pan using the parchment paper. Cut the bars into 16 equal squares before serving.
Notes
- To thaw the frozen raspberries, simply set the package on the counter about an hour before you want to bake the bars.
- If you prefer to use fresh raspberries in place of the frozen ones, you’ll need 2 ½ cups total. Gently mash 2 cups of the berries, then stir in the remaining ½ cup before proceeding with the filling.
- Leftover bars can be stored in the refrigerator for up to 5 days.
- You can use fresh raspberries in place of frozen if you prefer. You’ll need 2 ½ cups of fresh raspberries. To make the filling, add 2 cups of the raspberries to a bowl and gently mash them. Stir in the remaining ½ cup of berries along with the other filling ingredients before proceeding with the recipe.
- You can use an equal amount of all-purpose flour in place of the almond flour if needed.
- You can use an equal amount of dairy-free butter to make these bars dairy-free.
- Yes, you can use an 8-inch square pan instead of a 9-inch one. Since the pan is a bit smaller, the bars will be thicker and will most likely require an extra 5 or 10 minutes of baking time.
- To keep the parchment paper secure while baking, you can use a binder clip on each side of the pan (see photos).
- In order to allow enough time for the raspberries to thaw, place the bag on the counter at room temperature about an hour before you’d like to bake the bars. Or, you can place it in the refrigerator to thaw overnight.
- The cooling process is vital to the final texture of the bars, so don’t skip it! The raspberry layer will thicken as the bars cool. To hasten the cooling process, place the pan in the refrigerator.
Nutrition Information:
Yield:
16Serving Size:
1Amount Per Serving: Calories: 179Total Fat: 4gSaturated Fat: 1gTrans Fat: 0gUnsaturated Fat: 2gCholesterol: 4mgSodium: 82mgCarbohydrates: 34gFiber: 3gSugar: 17gProtein: 3g
These raspberry crumble bars sound absolutely delightful! Your passion for creating delicious, versatile recipes always shines through. The versatility of this recipe is truly impressive, and I appreciate your attention to detail. Keep up the fantastic work!