Making a Minion Cake {Beyond the Oven}
Making a minion cake is so much fun! The little ones in your life will love this whimsical cake, and you will too, because it is delicious.
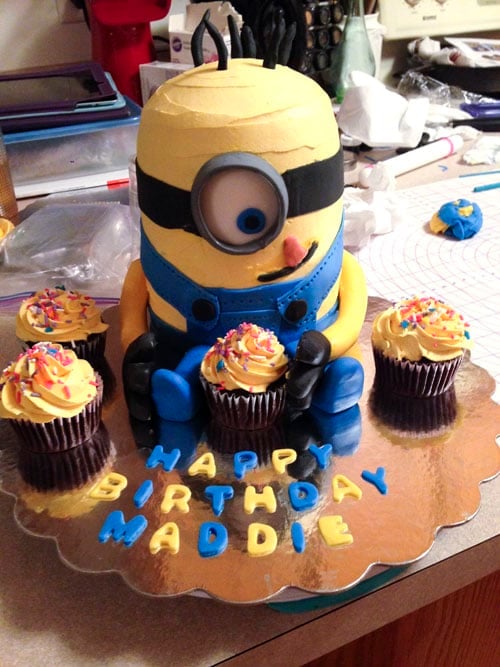
Hey guys! A few weeks ago I made a minion cake for my 13- year old niece’s birthday party and posted it in one of my weekend series. You all loved it and loved it even more on Facebook. With all the requests for a HOW-TO, I figured I should let you in on how easy it was to make this minion cake so you can WOW your loved ones too! But first let me start by saying, I was not planning on blogging this, so I did not take detailed step-by-step pictures of everything. So please bear with me as I explain in words where the pictures do not go.
First of all, here is what you will need to make this minion cake:
1) – Your favorite chocolate cake recipe, baked to make:
- 3 6-inch round cakes
- 1 6-inch cake, baked in a hemisphere pan (aka a ball pan)
- I used my chocolate cake recipe to bake three 6-inch round cakes, one 6-inch half-ball and a few cupcakes for display.
**Note: if you want a bigger cake, use 3 8-inch round cakes and 1 8-inch cake baked in a hemisphere pan and double the recipe above.
2) – Your favorite frosting, colored yellow. Find mine HERE.
**Note: I decided not to cover the entire cake in fondant because I dislike the taste of fondant and would rather have people enjoy the birthday cake. So I went the frosting route. Feel free to buy more yellow fondant to cover your cake instead of yellow buttercream frosting.
3) – Fondant:
- 1 pound white, 1 pound yellow, 1 pound blue fondant
- OR 2 pounds white fondant (instead of buying the individual colors, you can color the white with blue and yellow gel color pastes)
- Black gel coloring, blue gel coloring
Directions:
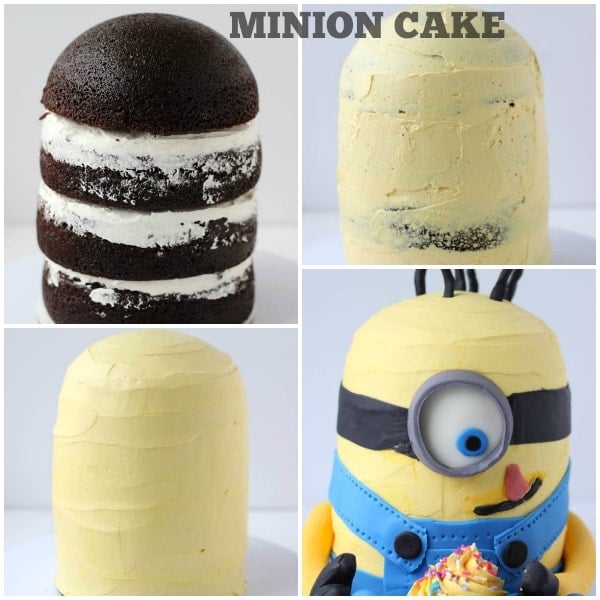
- Bake your cakes the day before. Wrap in plastic wrap and chill overnight. It’s always easier to work with chilled cakes.
- The next day, make your frosting. I used my basic whipped vanilla buttercream colored with a few drops of yellow Wilton Icing Colors
- Fill your cake with your frosting.

Crumb coat your cake with frosting. Refrigerate for 30 minutes.
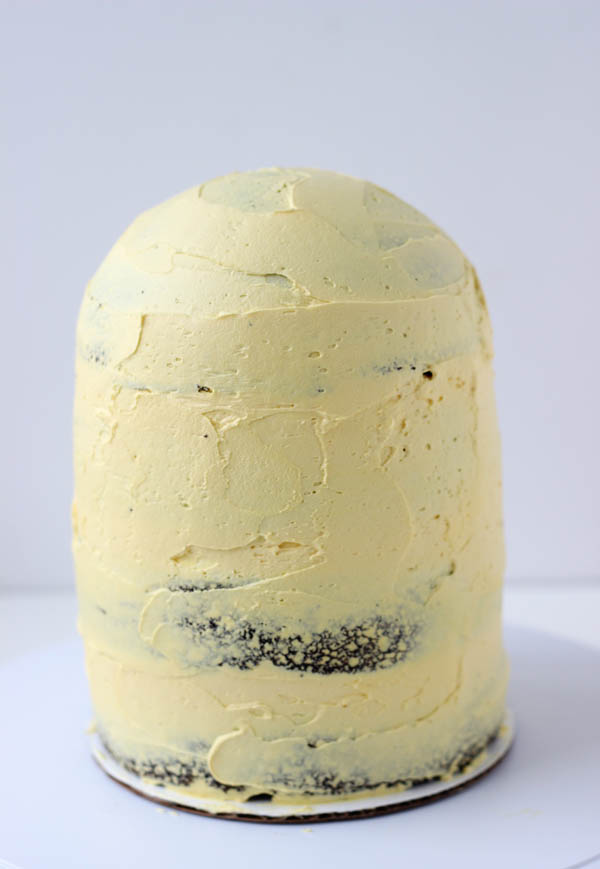
Frost cake with a thick coat of frosting. Smooth frosting as much as possible. Chill frosted cake for an hour or two to harden frosting. It must be hardened before you can proceed. (Again, you can cover your cake in yellow fondant if you choose to here and skip frosting the cake. Just get a pound of yellow pre-colored fondant)
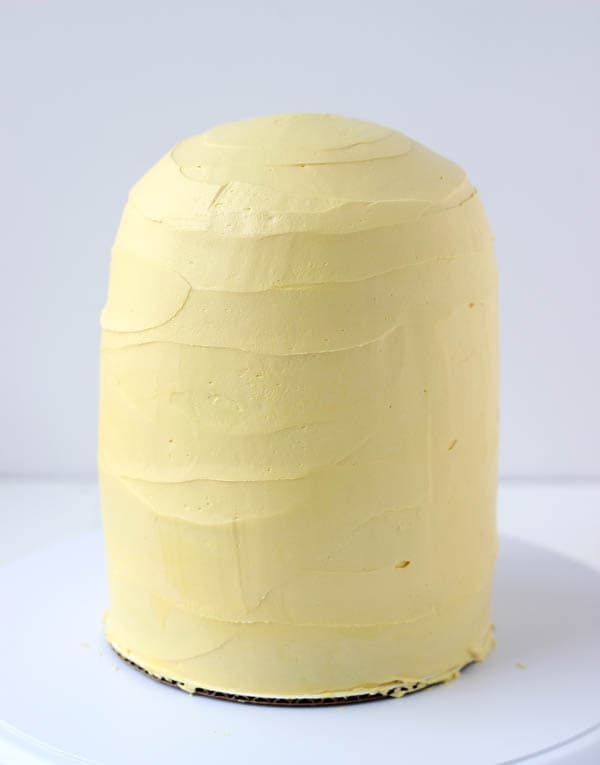
While the cake chills, make all the features to bring the minion cake to life.
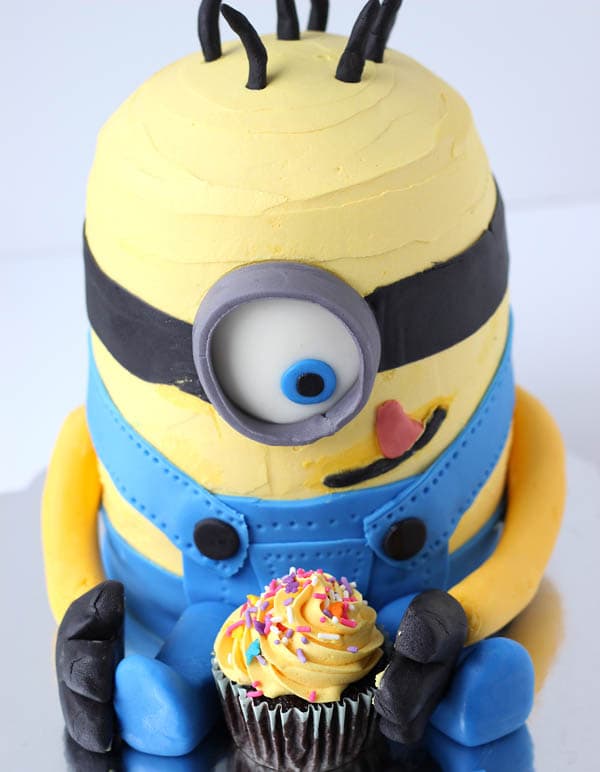
First you will need to color your fondant as needed using gel paste colors. You will need yellow, blue, black and gray. Here are the components:
- One white circle for the eye (with blue pupil!). Some people do two eyes, so you can here.
- A gray band for the goggles which I wrapped around to make it 3-D
- One black headband. I’m going to call it a headband, but it’s the black band you see coming from the goggles.
- Two arms with attached black hands. Here just roll out logs of yellow fondant into sausage like rolls and for the hands, we just sculpted them free-hand.
- Tongue and lip: free style sculpt these
- Blue overalls: For this we had four blue rectangular bands detailed with a toothpick. Two squares (one big and one small) for the front of the overalls. And two buttons. Note the front mirrors the back but you do not have to do the overalls at the back.
- Two feet. These are just two blue stubs that were sculpted to look like feet.
- Black hair: small rolls of black fondant on toothpicks. I used the toothpicks to attach them to the top of the cake.
Finally, assemble all the parts. I used edible glue (gumpaste dissolved in water) to attach the fondant to the cake.
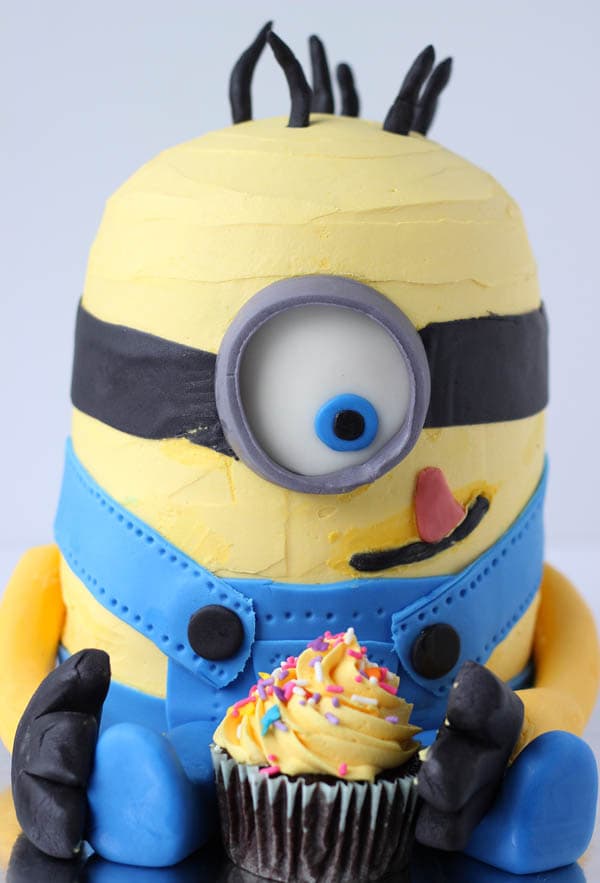
So there you have it. The completed minion cake. It looks wonderful doesn’t it?
Again, I apologize for the lack of pictures of the assembly. But I hope the step-by-step descriptions will help you. I had tons of help from my husband in the assembling and that made it easier to hold things down. If you have any questions please let me know in the comments below.
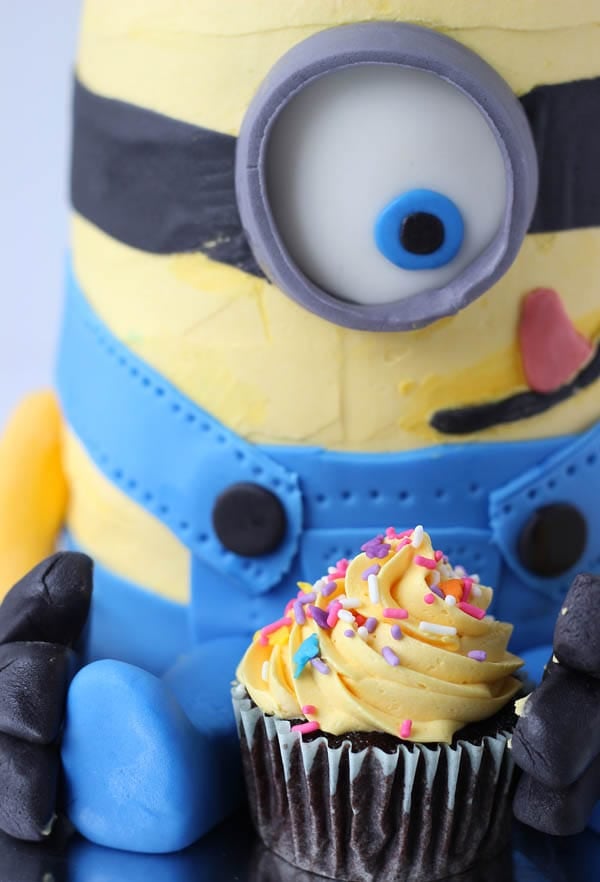
On close look, it’s not perfect (torn band, uneven edges etc) but that doesn’t matter. My niece loved it!! She was over the moon and everyone at the party was amazed by the cake. Hope you will make this cake for a loved one who enjoys the minions or at your next minion themed party. If you have any questions, please don’t hesitate to ask in the comments below. Oh: this cake served up to 25 people at our party with plenty leftover.
Tools I used in this recipe: (some affiliate links included)


**This post contains affiliate links. Just FYI!**
Read more at https://www.loveandoliveoil.com/2014/03/april-kitchen-challenge-eclairs.html
Read more at https://www.loveandoliveoil.com/2014/03/april-kitchen-challenge-eclairs.html

Hey
Loved minion cake.gud job
Want to know how many pounds it was including weight of fondant cream etc?for how many people it was sufficient?
Sofia, I don’t know how much this cake weighed but I do know it fed about 20 people at the birthday party with plenty leftover. Hope this helps 🙂
This is so amazing! I am definitely making this for my nephews birthday at the end of June. How many people did this serve and how exactly did you cut and serve it? I don’t want to mutilate the cake, which I know I will do without any instructions! Thanks so much!
Amazing! Really love your creation!
Awesome job! Looks better than the one I made for my son’s birthday.
I have been so crazy busy this month I can’t believe I missed tutorial. I just saw it posted on Wake Up Wednesdays. YOU ARE AMAZING! What a lucky niece you have! I love that you frosted the cake I’m not big on fondant either. Isn’t cake decorating (especially for loved ones) so fun? Bravo to you Zainab!
GREAT job, I love this. I’m doing a Minion party for my son this summer, I may have to give it a shot!
Zainab, I do not for the life of me know how in the world I missed this cake, but truly, there are NO words! It is simply beyond amazing! I have a little nephew who would probably never let us eat this! Such an amazing job and fantastic tutorial!! Thank you so much for sharing at Best of the Weekend and of course, pinning! Have a happy Sunday and a fabulous week!
Hahhah it’s been crazy Cindy!! Thanks for always stopping by dear! Hope you had a great weekend 🙂
I am in awe of your skills! This cake is beyond amazing!
Thank you so much! I love this cake and will have to give it a try!!!
Thanks Karen!
Aaah! So cute! And you make it look so easy! 😉 I’m pretty sure my attempt would end up on one of those craft-fail lists…
Julia it is really not that hard I promise!!
This is one seriously cute cake! Almost to cute to eat..almost 🙂 Check this awesome minion out from the best of the weekend and this very well may the best 🙂
Cathy
Thanks Cathy!
Saw this on Pinterest and had no idea it was yours! I love it, Zainab! It’s so much fun and perfect for any kid’s party.
Thanks Jelli!!