Decorated Cow Cake Recipe
Thank you Florida Dairy Farmers for sponsoring this decorated cow cake recipe post. As usual, all opinions are 100% mine. I love sharing with you brands/products I use and enjoy in my kitchen.
I have a fun cake for you guys today, or I should say, a super cute cake, because this cow cake is knocking off my socks!!
It’s not my normal kind of cake that I would decorate (case in point: caramel macchiato cake) but from time to time, I step of my comfort zone, and most times it pays off. Like the time I made this epic minion cake for my niece. I guess now that I have a little one myself, I need to get my practice on for when it’s his turn. Who knows, we might throw a cow-themed party one day if he is obsessed with cows. 🙂
This cow cake was inspired by Florida Milk, the dairy association supporting local farmers in Florida.
I’ve had the pleasure of working with them the past few months, creating recipes and helping to promote the great benefits of dairy in our diets.
For our final recipe in the series (see the others here, here, and here), I wanted to make a fun and exciting cake that represents their love for everything dairy and cows. This cow cake is exactly that! It’s simple, playful, and will be perfect for any themed birthday party.
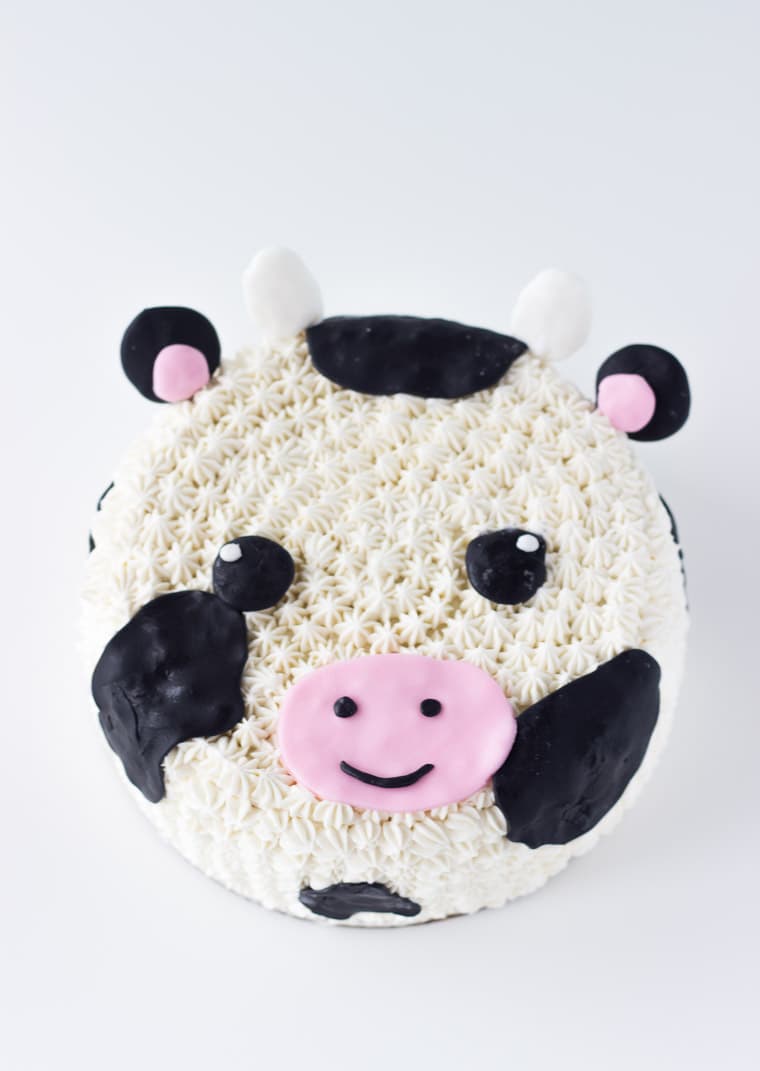
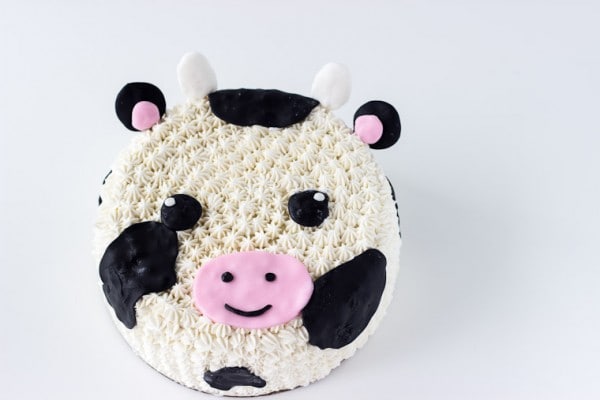
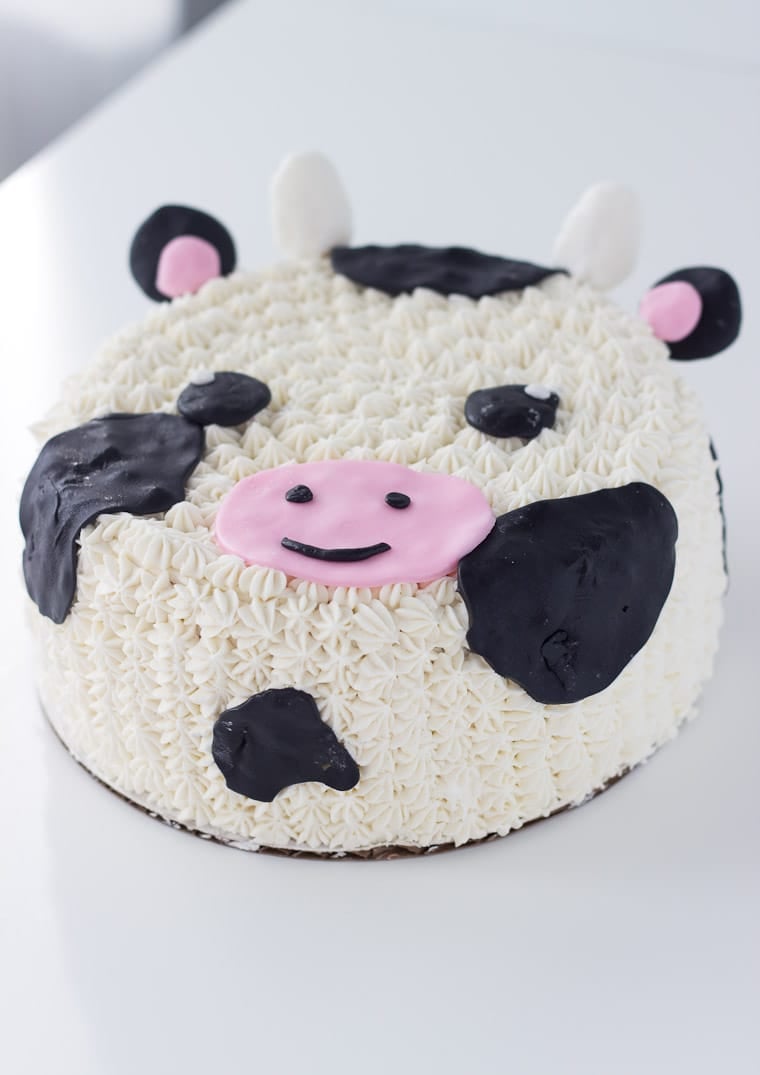
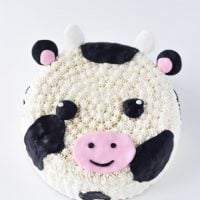
The cake itself is extremely simple to make. I drew inspiration from one I saw on Pinterest. A quick ‘cow cake’ search there brought up a lot of options, but this one from Coco Cake Land stood out so I went along with that idea. Using my favorite vanilla cake recipe, I baked and frosted a three-layered cake with whipped vanilla buttercream using a Wilton open star tip. Once frosted and chilled, it’s all about playing with fondant to get all the body parts. The black spots, mouth, horns, and mouth are all made with fondant.
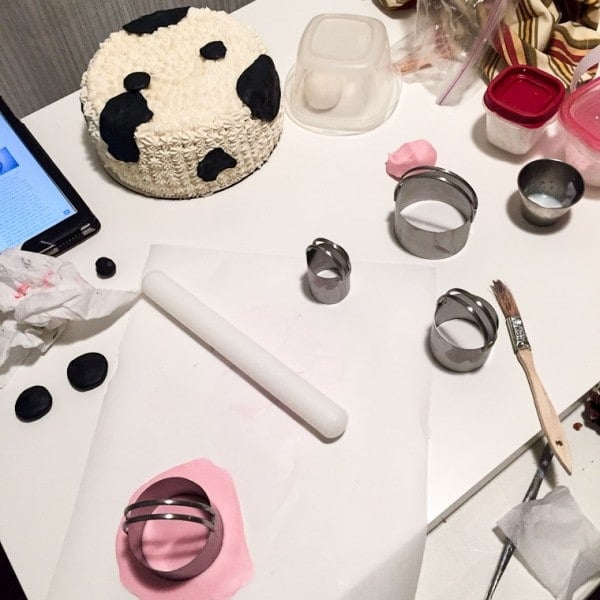
Here’s what my setup that night looked like.
Make sure you read the recipe below in full before starting, to ensure you have all you need. Also, for more detailed instructions and step-by-step pics, check out this post. I winged it from a picture on Pinterest but I know not everyone can.
The cow cake is a super fun cake to make for a loved one. Here’s the recipe!!
Cow Cake
A fun and easy cow themed cake!
Ingredients
Instructions
Assemble the cake
- To assemble the cake, place a layer of cake onto a cake board or serving place. Spread about ½ cup of your frosting on the cake. Top with the second layer of cake and spread about ¼ cup frosting on the top. Using a thin layer, crumb coat the sides of the cake. Using a small open star tip (I used Wilton tip 21), pipe the frosting all around and the top of the cake. Chill cake for at least 30 minutes.
For decorating:
- In the meantime, roll our your black fondant. Using a round cookie cutter, cut out three to four round circles (you can cut out as many as you would like…these will be the black spots/ patches of the cow). Gently, using your fingers, pull on the black circles to form irregular shapes (these are the black “spots” on the cow). Using a paint brush, brush a thin coat of water onto the back of each circle and adhere to the chilled cake. (the water should only be a tiny amount to wet the fondant and help it stick to the cake. Too much will cause it to tear)
- Roll out the pink fondant and cut out a circle. Tease the circle gently to form an oval. Adhere the pink oval to the cake as the mouth. Using two small dots of black fondant, add the nostrils to the pink fondant and use a small roll of black fondant for the mouth.
- Similarly, use the black fondant and cut out balls that you will need for the eyes and ears. Make the eyes into flat circles and adhere with water. Add irises with white fondant dots. For the ears, use a toothpick or skewer to attach to the top of the cake. Add flatten pink balls to the ears. Similarly, use the white fondant to shape the horns and adhere with toothpick or wooden skewers.
Notes
Inspired by Coco Cake Land
This cake is too cute for words!
Thanks Allie!!
I can’t even with this. This Cake. It is MOOVELOUS. I had to.
But really, how cute and fun is this! Totally pinning!
It is moovelous!!
This is so sweet, Zainab! I hope your little bundle of joy becomes cow obsessed so you can make this again for his birthday. It’s amazing. And what a great partnership with Florida milk!
Lol me too! We have a safari-themed room for him so hopefully he loves animals later.
This cake is SO well decorated and totally adorable! Obsessed 🙂
Thank you Medha!
Omg, how cute is that!!
Yes! Thanks!!
Oh my this cake is so cute! I love it. Maybe for Olivia’s first birthday!?!
YES!!! She’s getting close to one.
Aaw this cake is the cutest, Z! Love the cow!:)
Thanks Kelly!
My goodness, this is too cute! Great job, Zainab. I love that you are supporting my local dairy farmers too 🙂
Thanks Ashley! I’ve loved working with them very much.
Aww, I love it! I bet the sweetie was delish too. You did a great job on the minion cane too.
It was a great cake!!
Seriously the cutest cake ever.
It looks to cute! Love this cow! 🙂
Great job! This turned out absolutely adorable!
Thanks Meghan! It was fun 🙂