How to Dye Eggs Without a Kit

Hi friends!
Coming in last minute with a quick how-to!
How to Dye Eggs Without a Kit
Learn how to dye eggs without a kit using only 3 ingredients. You will end up with colorful and beautiful Easter eggs using just the materials and tools you already have in your pantry!
If you are like me, you forget to grab the kit until Easter is upon you. Don’t worry, this tutorial has your back.
Everyone loves dying Easter eggs, and it’s a favorite tradition when it comes to this springtime holiday. It is one of my favorite activities with my kids and I’m sure it is for many of you too.
With Easter not that far away, there is still plenty of time to gather around the table with your family and dye some Easter eggs.

If you are running short on time but don’t feel like running to the store to get a decorating kit – don’t fret! You can make colorful and beautiful Easter eggs with a few tools you already have in your pantry!
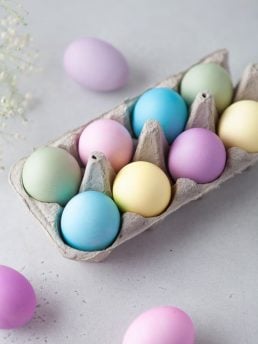
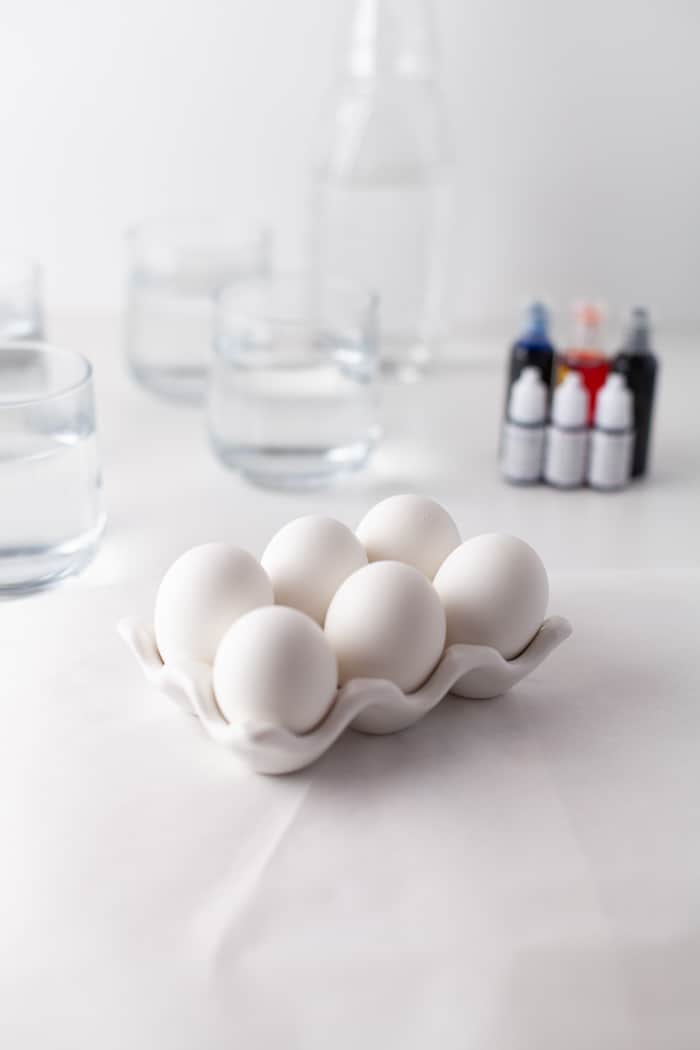
All you need is one dozen white eggs, food coloring, and white vinegar. Yes! Just three simple ingredients. I’ll walk you through how to dye easter eggs without a kit.
While egg dyeing kits are easy to just pick up at the store, they can get expensive, and they don’t always give the best results. If you are hoping to color a few dozen eggs, doing it with your pantry items is much more budget-friendly.

Think of your egg as a blank canvas. Decorating eggs is so much fun. You can create many different hues to display on your table during Easter dinner. Your eggs can be decorated and dyed to any color of the rainbow.
Or you can stick with a specific color palette to match your delicious spread. Whatever colors you decided to dye your eggs, the vital thing to remember is that this is a fun activity for everyone in the family!
I let my oldest pick his colors and we always end up with fun colors.

DIY Egg Tips
Here are a few quick tips to keep in mind when you are dying your eggs.
1. Boil Them
Always boil them first! No one wants to have raw eggs break during an activity with kids.
2. Decorate cold eggs
As you begin to decorate the eggs, working with chilled, hard-boiled eggs will be easier all around. Make sure to use a food-safe dye. This is why I suggest food coloring. It’s safe, easy to use, and gives you the best results. However, you can always use natural coloring if you’d like.
3. Use lots of color
While I suggest 1 to 2 drops of food coloring, you may need to add around 3 to 5 drops or even 5 to 10 drops, depending on the tone you want. The more food coloring you add to the white vinegar, the darker the color. Lighter colors like yellow, orange, and pink may benefit from soaking them overnight, so keep that in mind!
You can find a full tutorial below that walks you through how to dye Easter eggs without a kit.
Once your eggs are dyed, it’s your decision just what to do with them. You can add them to the centerpiece of your table to put them on display for everyone to enjoy or hide them throughout your yard (just remember where you hide them!!).
Materials needed
Use these materials to color easter eggs without a kit
- White vinegar
- a Dozen eggs (white)
- a variety of food coloring
How to Dye Easter Eggs Without a Kit
In a large pot set over medium heat, bring some water to a boil. Add the eggs and boil for about 8 minutes.
Remove from heat and transfer eggs to a large bowl. Let them cool until ready.
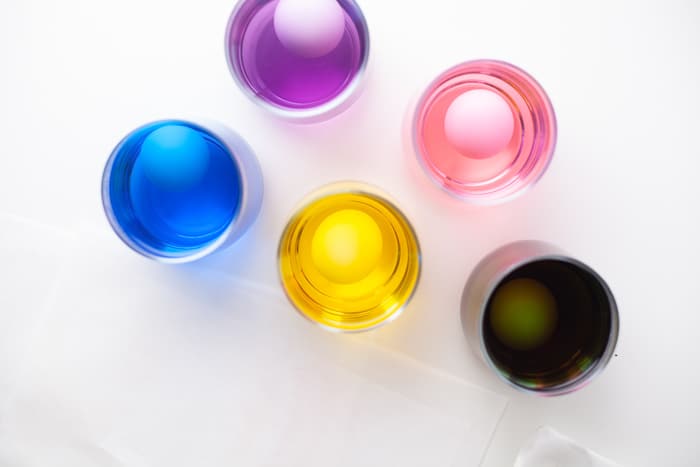
Protect your work area with paper towels. Set out the cups or bowls you will be using.
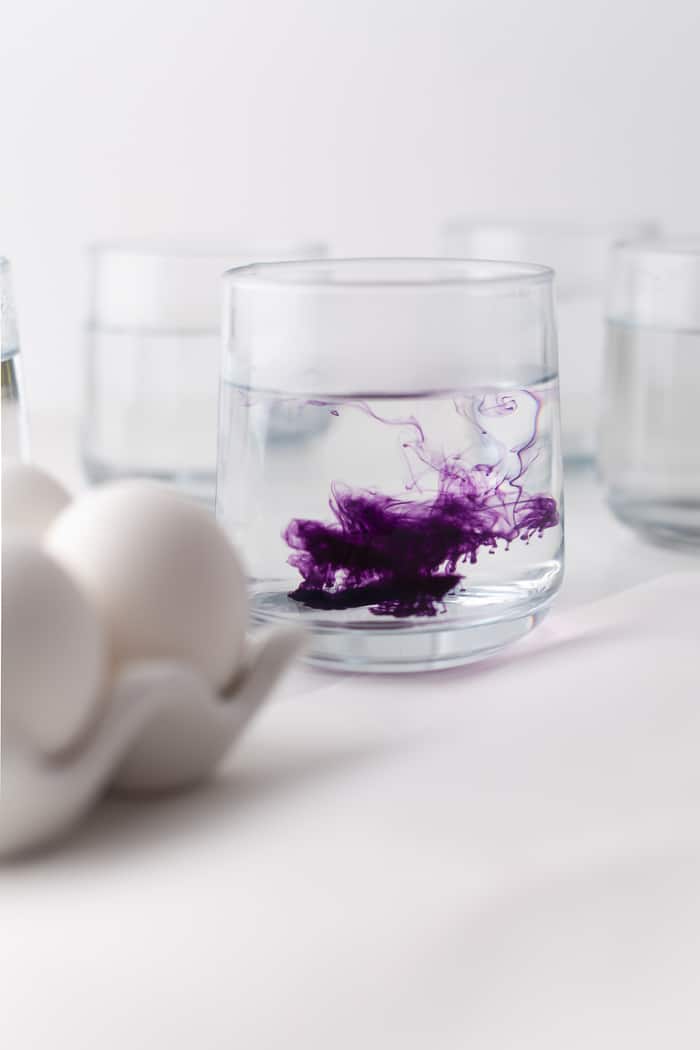
In each of the cups or bowls, pour enough hot water to cover an egg completely. (Don’t put in the egg yet!)
Add 1 tablespoon of white vinegar to each bowl and 1 to 2 drops of food coloring. You can use a toothpick or skewer to add the food coloring, so it doesn’t get too dark. This also depends on the tone you want. If you would like them darker, add around 3 to 5 drops.
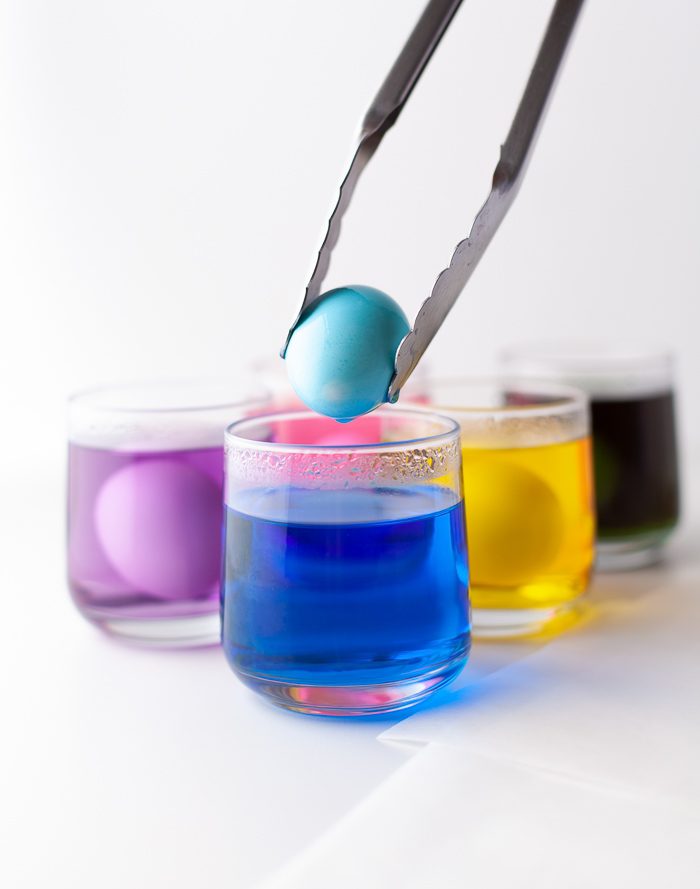
Place the egg inside the bowl and leave it for about 5 minutes. If you would like a darker hue leave the egg for a few more minutes or up to 30 minutes.
Grab the tongs and carefully pull out the egg. Place the eggs on the paper towel to dry.
Once you have finished with all the eggs, let them dry, and you are ready to use!

Your family would love to make your dipped eggs part of your family’s Easter egg hunt. These would be cute in Easter baskets too as gifts to your friends and family.
Happy Easter!

More Easter Recipes
- Speckled Easter Cake
- Easter Chocolate Cupcakes
- Easter Basketweave Cake
- Easter Cake Pops
- Lemon Easter Cookies
What do you think of this amazing Easter egg tutorial? What colors are you planning on dying your eggs? Let me know in the comment section below.
If you share across social media, make sure to tag #aclassictwist, so I can see your beautiful creation come to life!
Happy baking, friends!

How to Dye Eggs Without a Kit
Learn how to dye eggs without a kit using only 3 ingredients. You will end up with colorful and beautiful Easter eggs using just the materials and tools you already have in your pantry!
Materials
- White vinegar
- 1 Dozen eggs (white)
- Food coloring
Tools
- Large pot
- Tongs
- Paper towel
- Toothpick
- 1 Bowl or cup per color you would like to use. Make sure your container is tall enough so that the water with the food coloring completely covers the egg.
Instructions
- In a large pot set over medium heat, bring some water to boil. Add the eggs and boil for about 8 minutes.
- Remove from heat and transfer eggs to a large bowl. Let them cool until ready.
- Protect your work area with paper towels. Set out the cups or bowls you will be using.
- In each of the cups or bowls, pour enough hot water to cover an egg completely. (Don't out in the egg yet!)
- Add 1 tablespoon of white vinegar to each bowl and 1 to 2 drops of food coloring. You can use a toothpick or skewer to add the food coloring, so it doesn't get too dark. This also depends on the tone you want. If you would like them darker, add around 3 to 5 drops.
- Place the egg inside the bowl and leave it for about 5 minutes. If you would like a darker hue leave the egg for a few more minutes or up to 30 minutes.
- Grab the tongs and carefully pull out the egg. Place the eggs on the paper towel to dry.
- Once you have finished with all the eggs, let them dry, and you are ready to use!
- Enjoy!
Recommended Products
As an Amazon Associate and member of other affiliate programs, I earn from qualifying purchases.