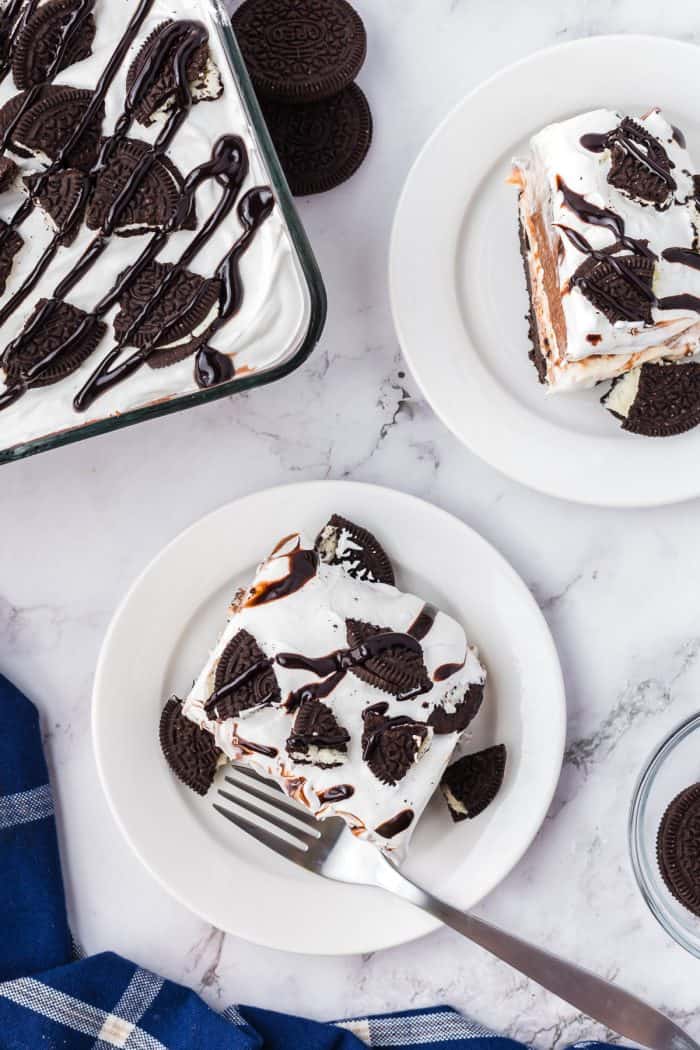
No Bake Oreo Layer Dessert
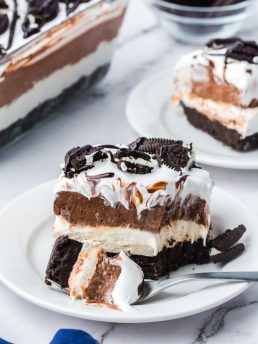
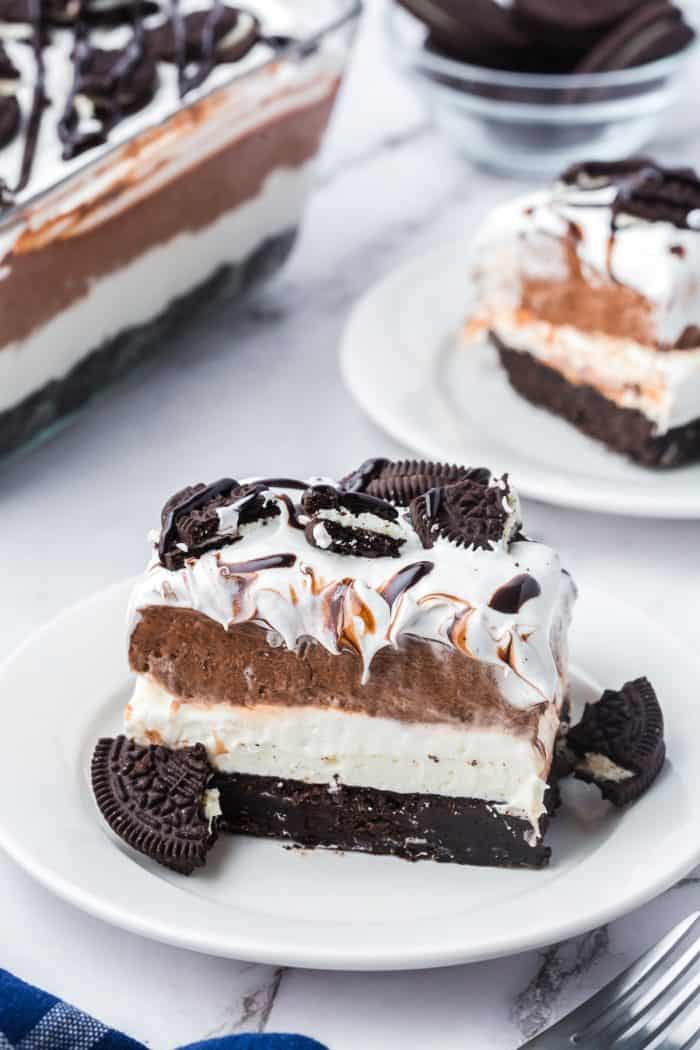
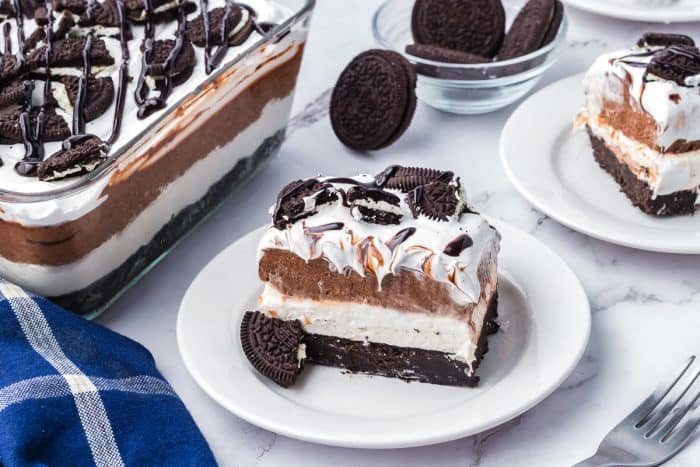
This dessert requires no baking and is layered with creamy goodness! Each bite of this no bake Oreo layer dessert has an Oreo cookie crust, a cream cheese layer, a chocolate pudding layer, and a luscious whipped cream layer with chocolate fudge sauce drizzled all over it with a sprinkling of crushed Oreo cookies!
Hey there, and welcome back, friends.
You are in for a heavenly treat!

Are you excited to sink your teeth into this dessert? Me too! It’s been calling my name ever since I made it!

No-bake desserts are the best, and I have a vast collection of no-bake recipes. As much as I love baking, making a dessert that the whole family loves and that I don’t have to turn the oven on is excellent. This dessert is perfect for serving any time of the year and not just for your family, but it’s also great for taking to parties. It’s so good there won’t be any leftovers!
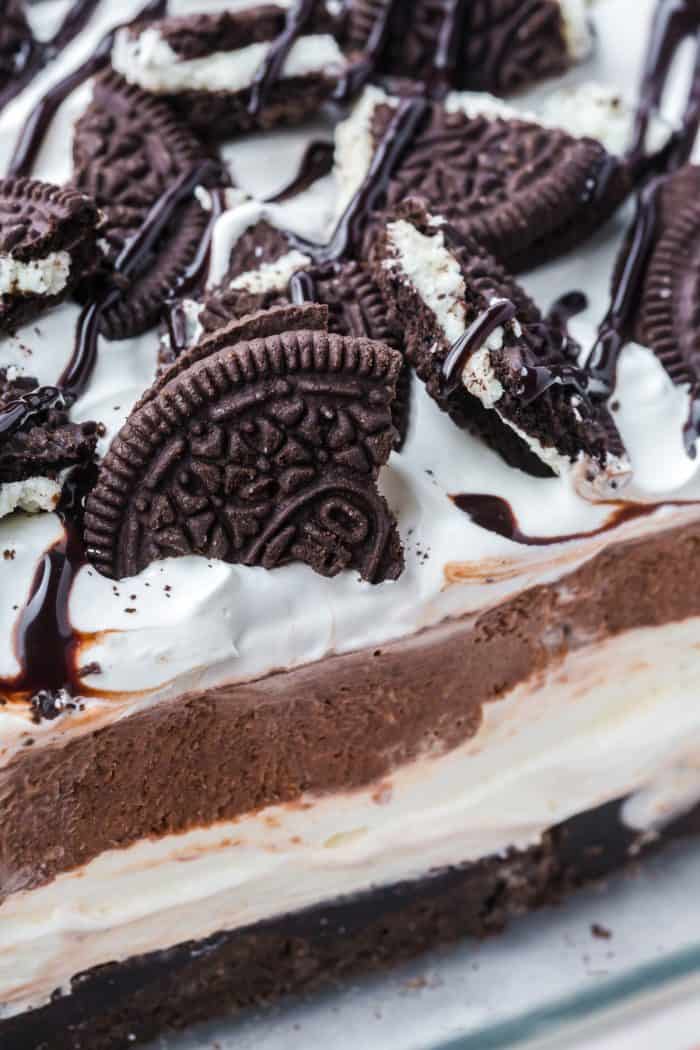
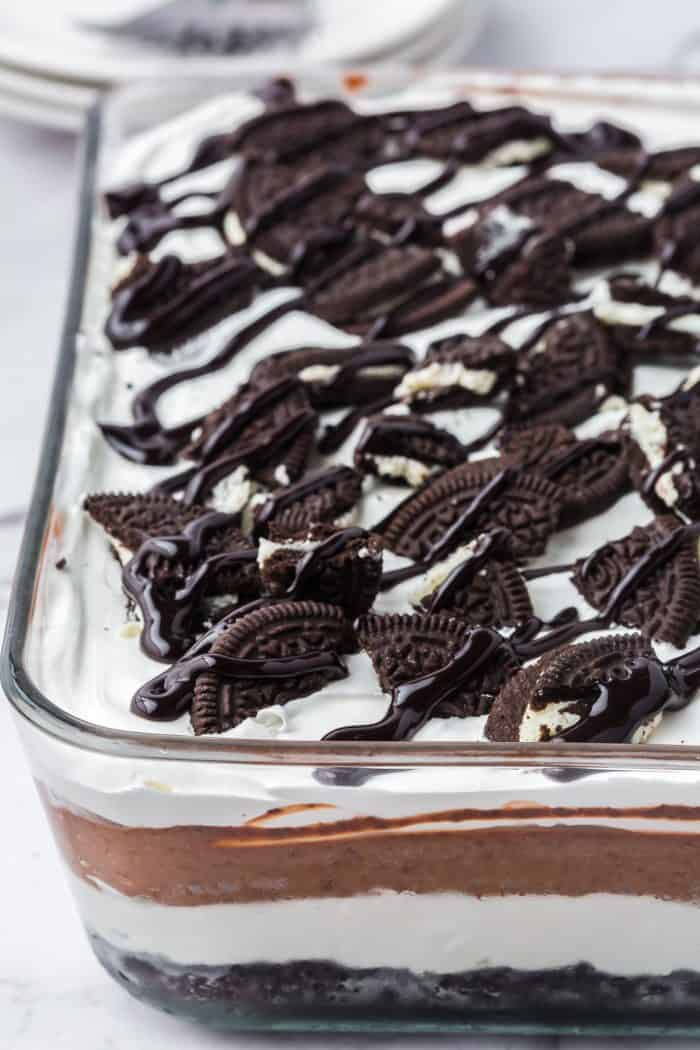
Let’s talk about the layers a little more. The Oreo crust is just like any Oreo crust you make for my cheesecake recipes. Then, there’s a cream cheese layer that is sweetened with powdered sugar and lightened up with whipped cream.
The chocolate pudding layer uses a store-bought mix, so it’s simple to make. Finally, a luxurious pillowy whipped cream layer finishes off this dessert. Of course, I recommend garnishing it with some chocolate fudge syrup and crushed Oreo cookies. It’s really that simple!
Ingredients

- Oreos
- unsalted butter
- cream cheese
- granulated sugar
- pure vanilla extract
- cool whip
- powdered sugar
- instant chocolate pudding dry powder
- evaporated milk
- chocolate fudge syrup
How to Make No Bake Oreo Layer Dessert
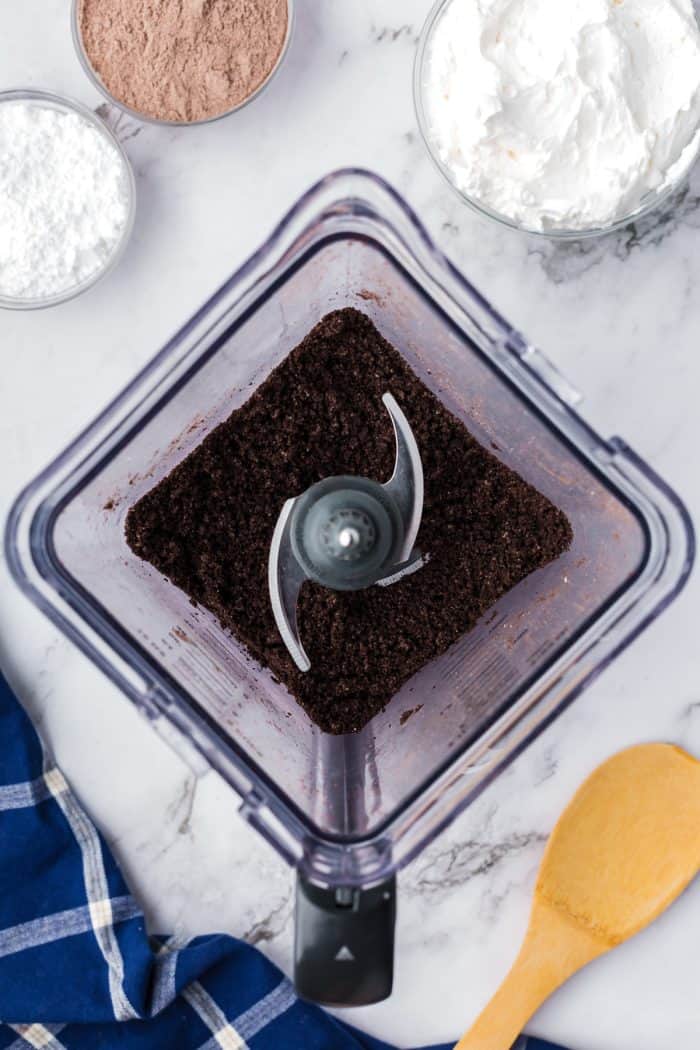
Make the Oreo crust. In a food processor, pulse all but 10 Oreos into sand-like crumbles.
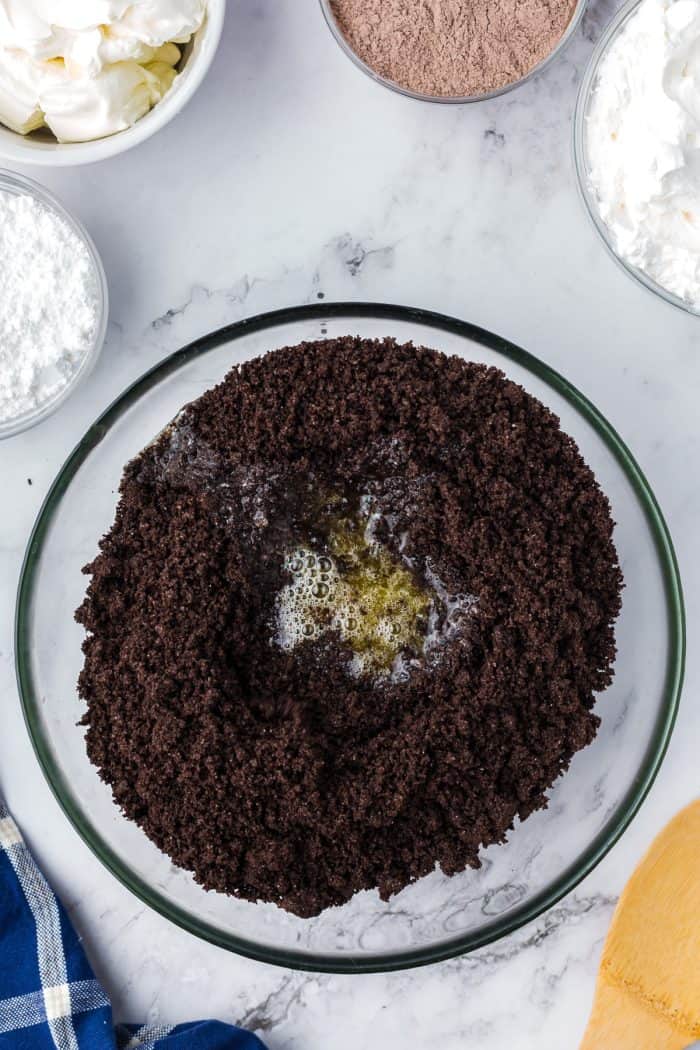
Mix the crumbles with the melted butter.

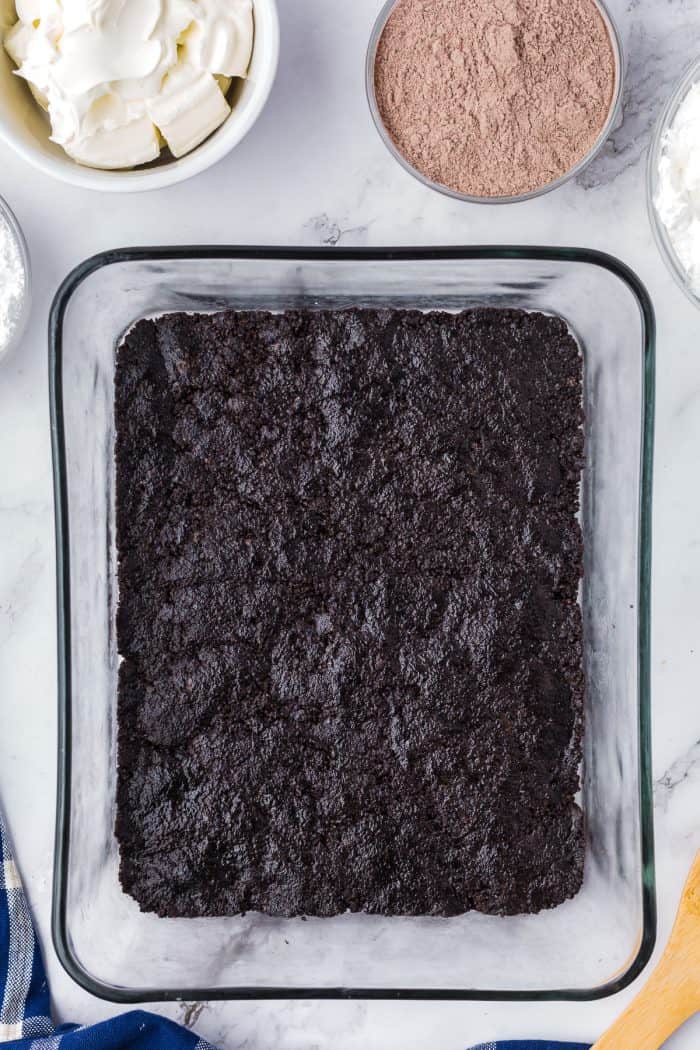
Press the mixture into the bottom of a 9X13-inch casserole pan. Allow the crust to chill in the fridge while you make the filling.
Make the filling. Beat the cream cheese, sugar, and vanilla until light and fluffy.
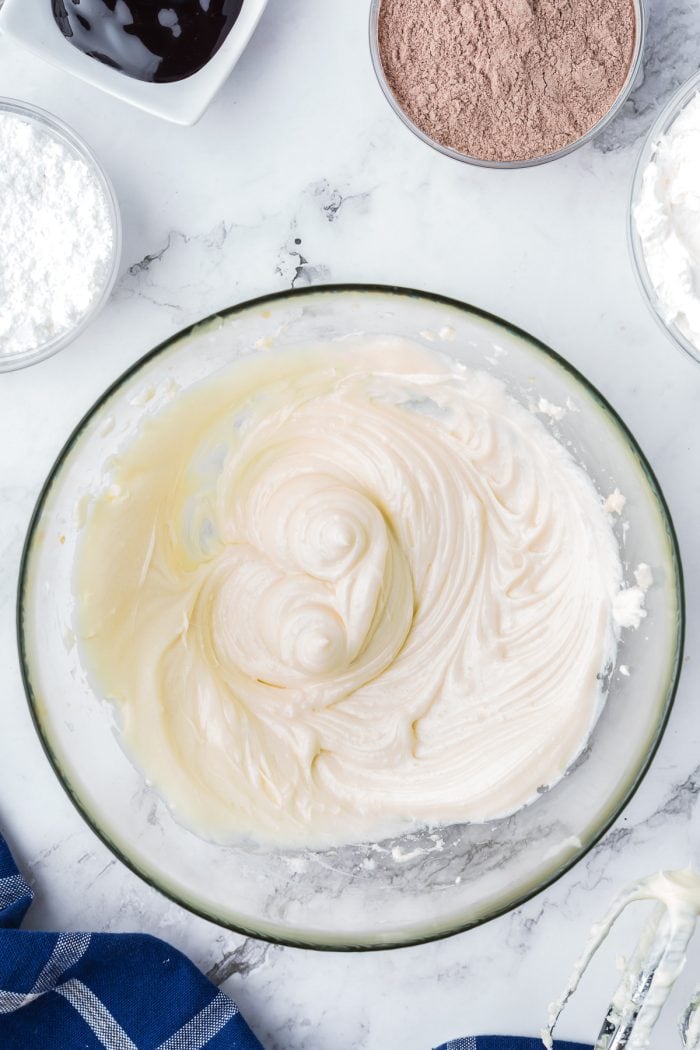
Fold 1 cup of powdered sugar into ½ of the Cool Whip in a separate bowl. Then, fold the Cool Whip mixture into the cream cheese mixture.
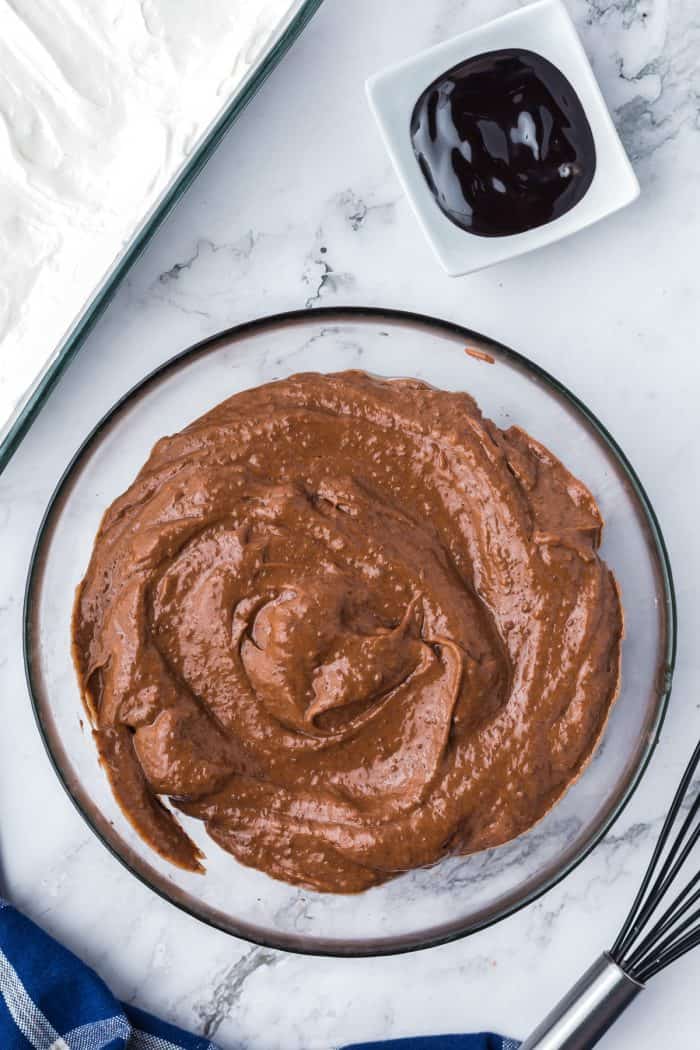
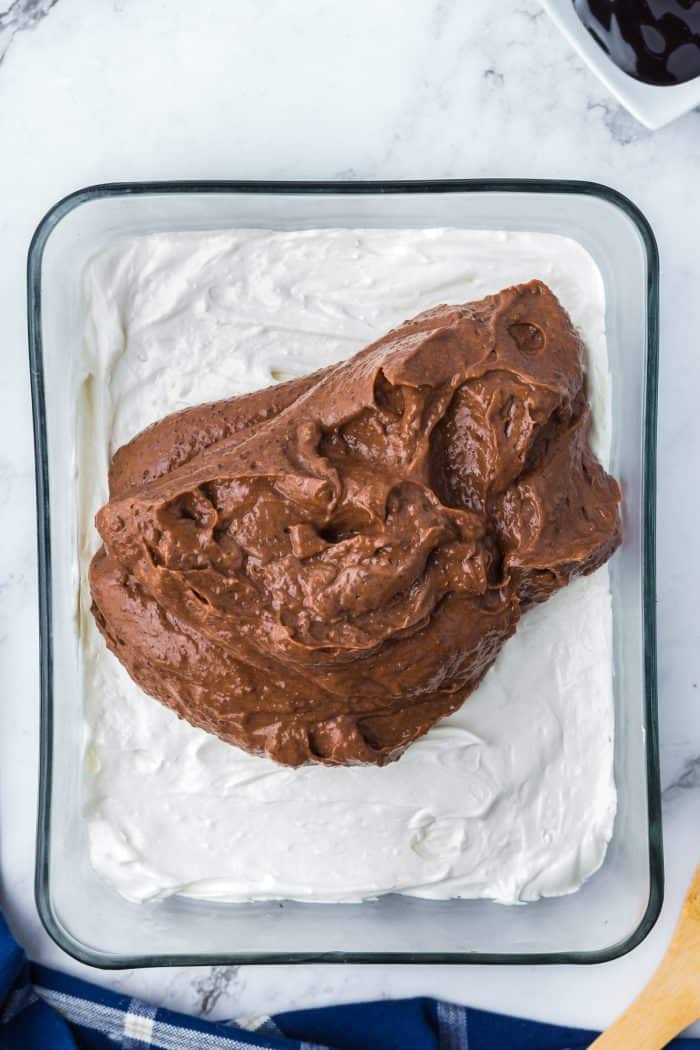
Make the pudding. Whisk together the instant pudding mix and the evaporated milk until the mixture thickens. Work quickly because the pudding will begin to set and get lumpy in just a few minutes.
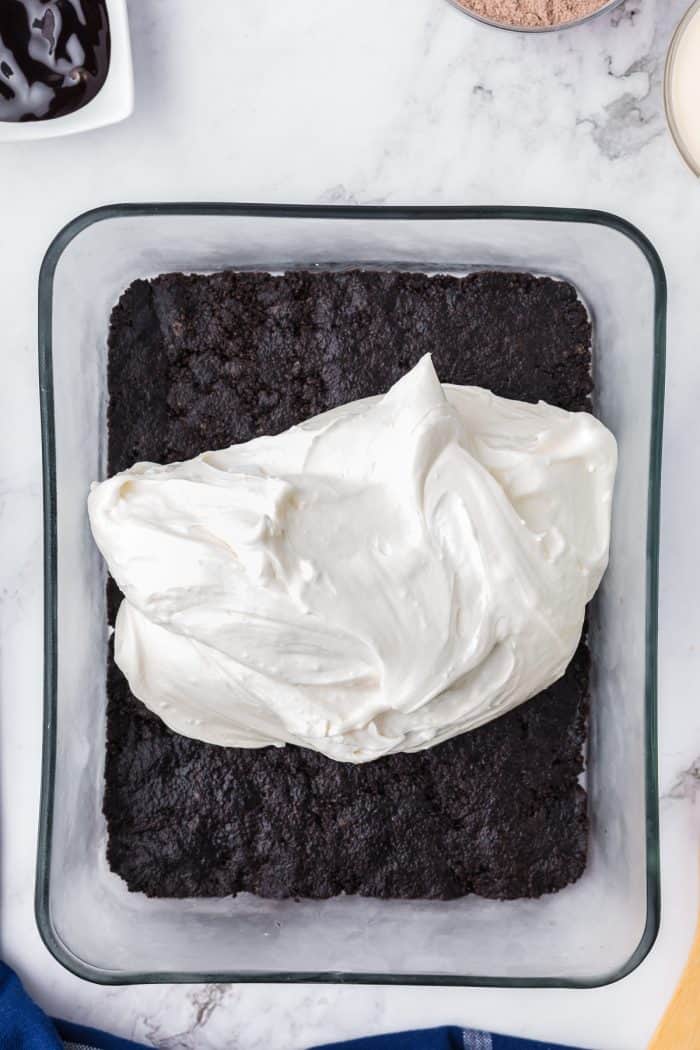
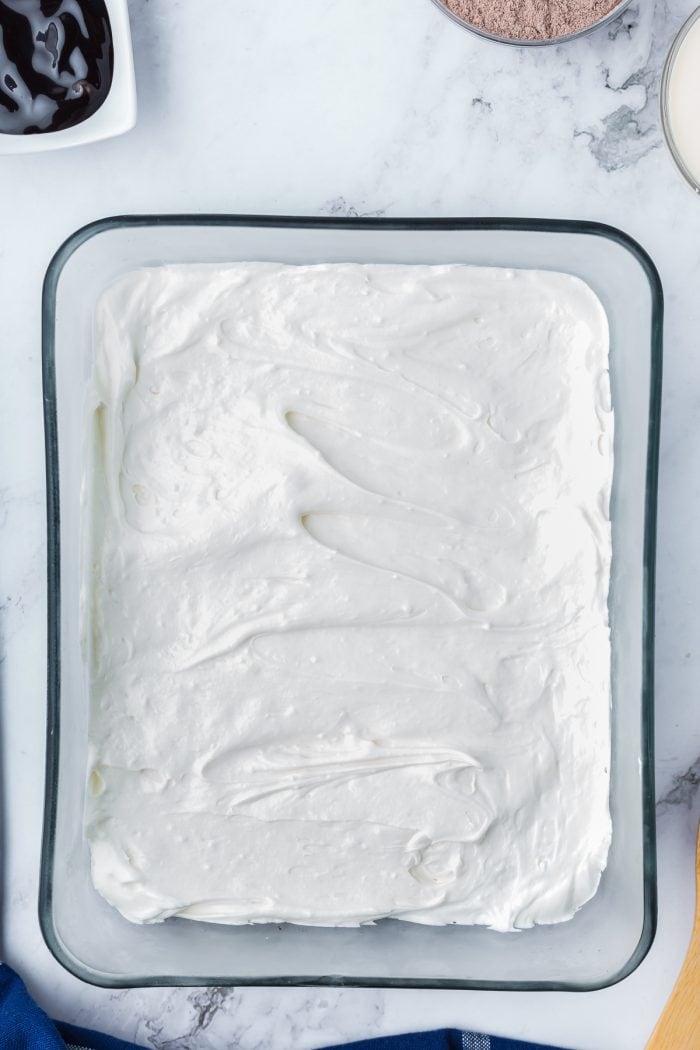
Assemble. Spread the cream cheese filling over the chilled crust.
Spread the pudding mixture over the cream cheese filling. Chill. Allow the dessert to chill in the fridge for at least 30 minutes.
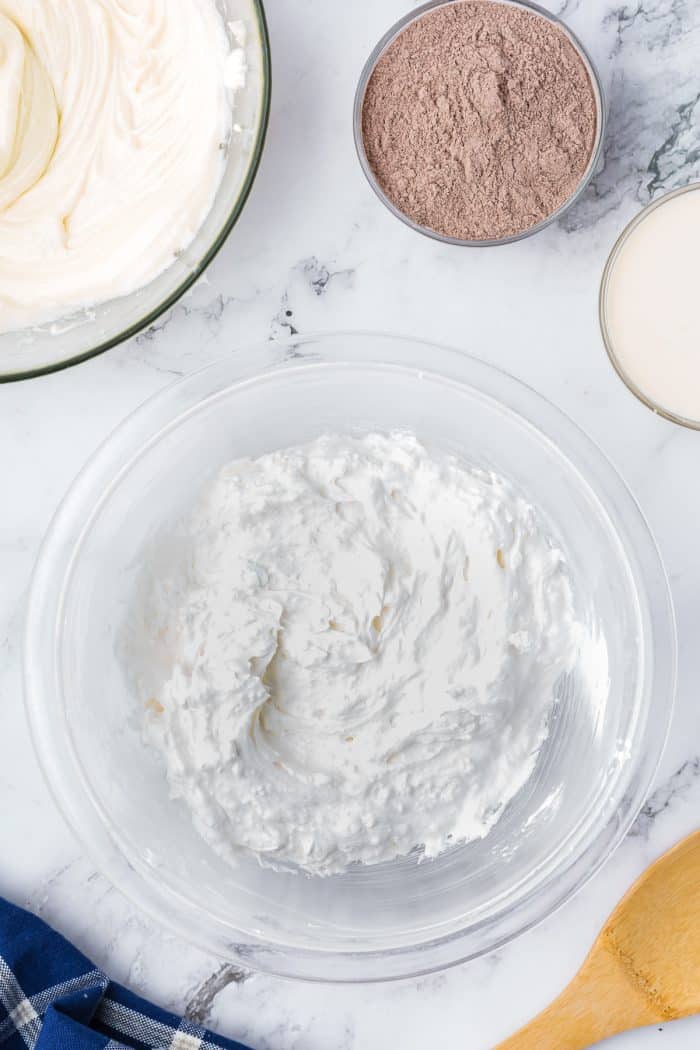
Make the topping. Fold the remaining powdered sugar into the remaining Cool Whip.
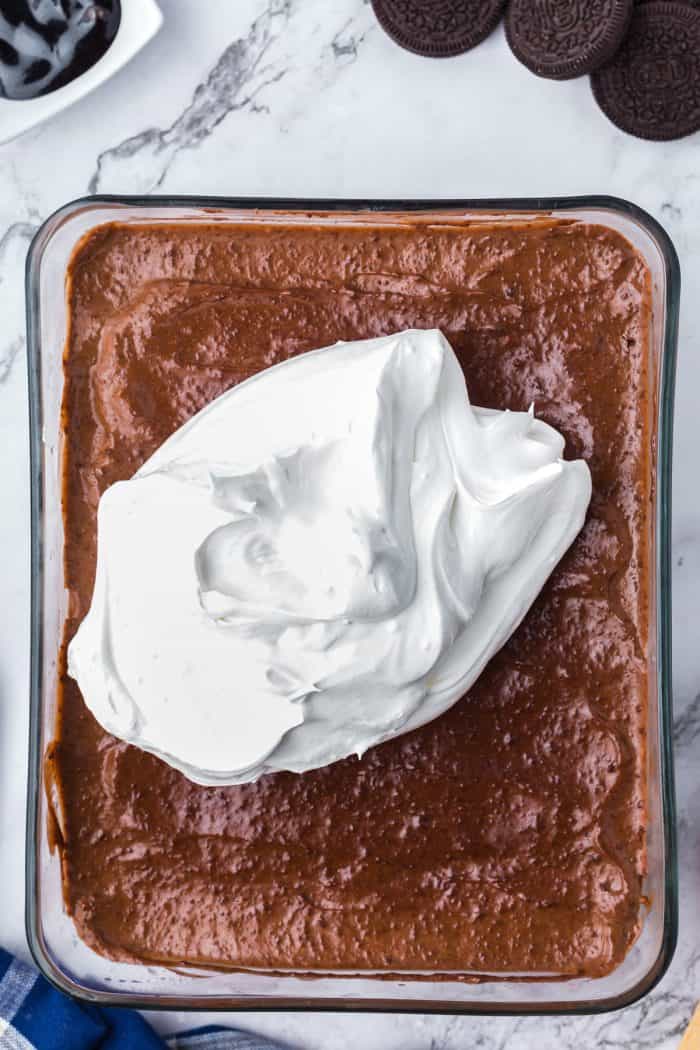
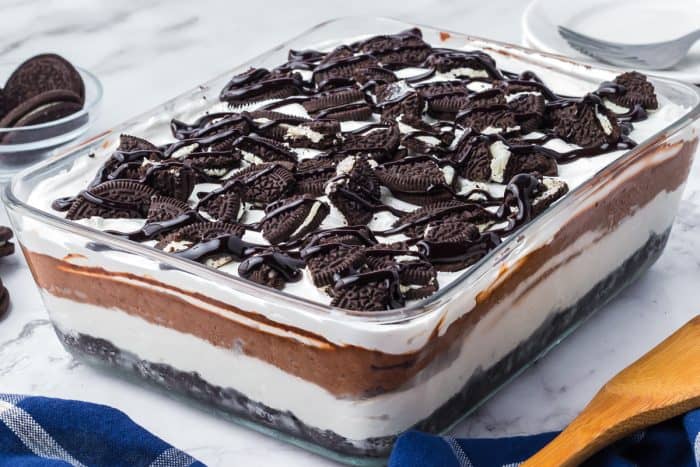
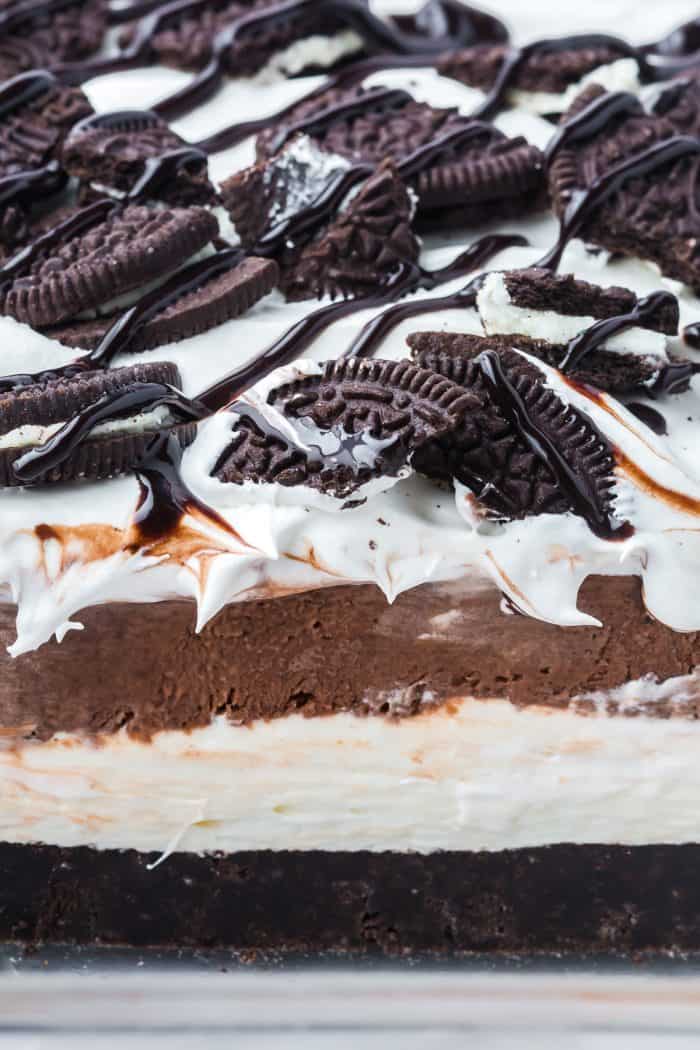
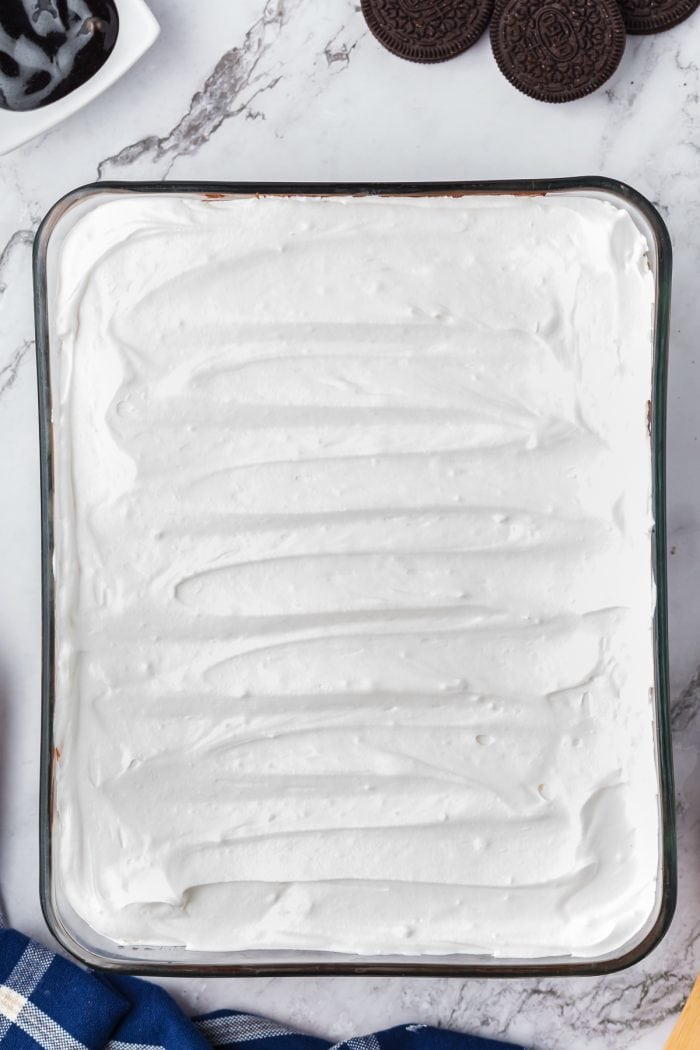
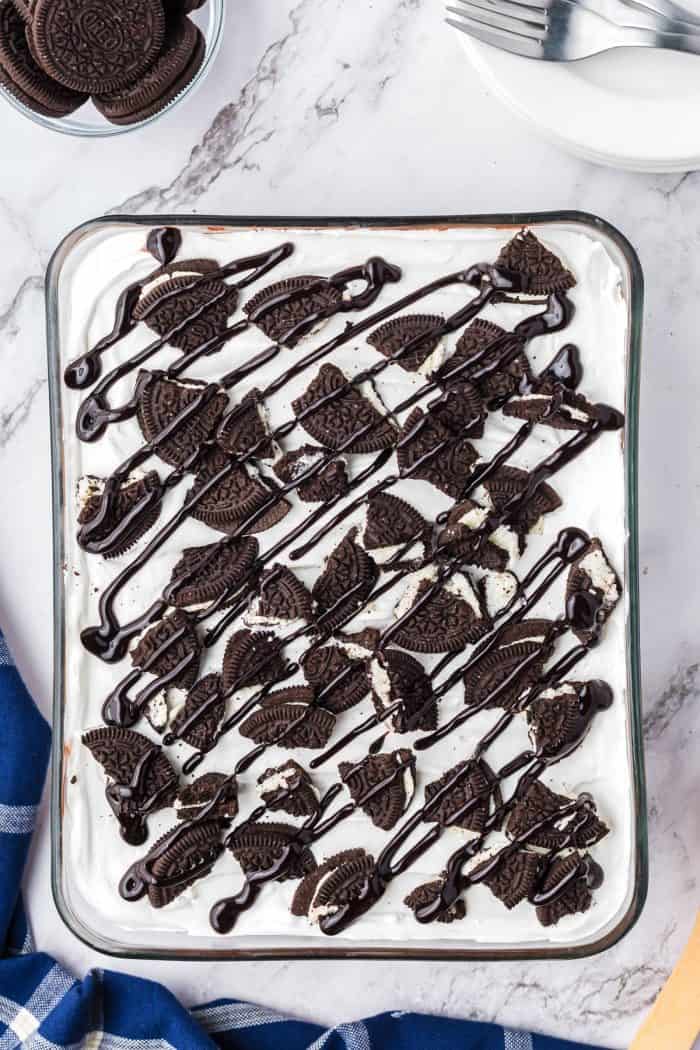
Finish it off. Spread the Cool Whip topping over the dessert.
Crumble the remaining Oreos over the Cool Whip topping, and drizzle the whole thing with chocolate fudge syrup.
How to Store
Once the dessert is set, wrap the casserole dish tightly with plastic wrap. You could also arrange individual servings in a single layer in an airtight container. It will keep in the fridge for up to 5 days.
This dessert freezes great. Pop the Oreo layer dessert in the freezer for a few hours to set before wrapping it in a double layer of plastic wrap. You could also arrange pieces in a single layer in an airtight container. You can store it in the freezer for up to 3 months. If you choose to freeze it, allow it to thaw in the fridge before serving.
More No Bake Recipes
- No Bake Oreo Cheesecake
- Tiramisu Recipe
- Raspberry Mocha Pie
- No-Bake Peanut Butter Chocolate Pie
- White Chocolate Raspberry Mousse
What do you think of this amazing no bake dessert recipe? What would you serve with a slice of this? Let me know in the comment section below.
If you share across social media, make sure to tag #aclassictwist, so I can see your beautiful creation come to life!
Happy baking, friends!
No Bake Oreo Layer Dessert Recipe
No Bake Oreo Layer Dessert
This dessert requires no baking and is layered with creamy goodness! Each bite of this no bake Oreo layer dessert has an Oreo cookie crust, a cream cheese layer, chocolate pudding layer, and a luscious whipped cream layer with chocolate fudge sauce drizzled all over it with a sprinkling of crushed Oreo cookies!
Ingredients
- 1 (13.2oz) package regular Oreos (divided)
- ½ cup unsalted butter, melted
- 8 ounces cream cheese, softened
- ½ cup granulated sugar
- 2 teaspoons pure vanilla extract
- 16 ounces cool whip, divided
- 1 ½ cups powdered sugar, divided
- 2 3-ounce packs instant chocolate pudding dry powder
- 2 12-oz cans evaporated milk
- 1 cup chocolate fudge syrup
Instructions
- In a food processor, pulse all but 10 Oreos into sand-like crumbles. Mix the crumbles with the melted butter and press the mixture into the bottom of a 9X13-inch casserole pan. Allow the crust to chill in the fridge while you make the filling.
- Make the filling by beating the cream cheese, sugar, and vanilla until light and fluffy. Fold 1 cup of powdered sugar into half of the Cool Whip in a separate bowl. Then, fold the Cool Whip mixture into the cream cheese mixture.
- Make the pudding by whisking the instant pudding mix and the evaporated milk until the mixture thickens. Work quickly because the pudding will begin to set and get lumpy in just a few minutes.
- Spread the cream cheese filling over the chilled crust. Spread the pudding mixture over the cream cheese filling.
- Chill. Allow the dessert to chill in the fridge for at least 30 minutes.
- Make the topping. Fold the remaining powdered sugar into the remaining Cool Whip.
- Spread the Cool Whip topping over the dessert, crumble the remaining Oreos over the Cool Whip topping, and drizzle the whole thing with chocolate fudge syrup.
Notes
Storage Instructions:
Refrigerator. Once it’s set, wrap the casserole dish tightly with plastic wrap. You could also arrange individual servings in a single layer in an airtight container. It will keep in the fridge for up to 5 days.
Freezer. Pop the Oreo layer dessert in the freezer for a few hours to set before wrapping it in a double layer of plastic wrap. You could also arrange pieces in a single layer in an airtight container. You can store it in the freezer for up to 3 months. If you choose to freeze it, allow it to thaw in the fridge before serving.
Some Substitution Questions:
Regular Oreo cookies – Feel free to use whatever chocolate cream-filled cookies you’d like. You could even use double-stuffed Oreos. The end product will just be a tad less chocolaty.
Vanilla extract – Almond extract will also do the trick. You’ll need a bit less; it’s a strong flavor.
Cool Whip – Feel free to make your own whipped cream and use that instead.
Evaporated milk – You could use whole milk instead. The end product just won’t be quite as rich.
Chocolate fudge syrup – Chocolate milk syrup would be a fine substitute.
Nutrition Information:
Yield:
12Serving Size:
1Amount Per Serving: Calories: 546Total Fat: 31gSaturated Fat: 21gTrans Fat: 0gUnsaturated Fat: 8gCholesterol: 61mgSodium: 204mgCarbohydrates: 62gFiber: 0gSugar: 55gProtein: 7g