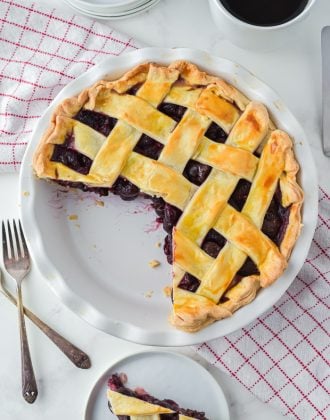
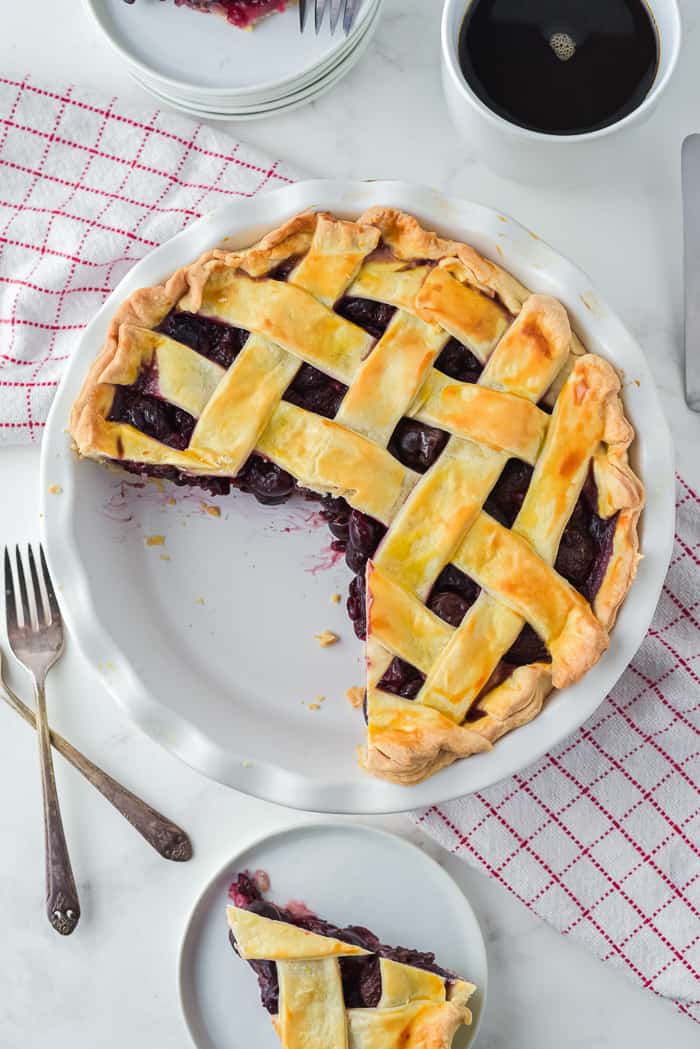
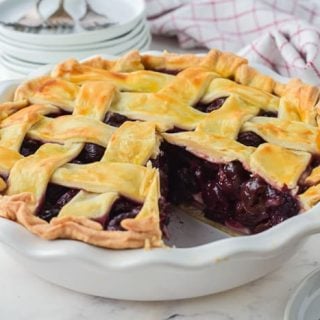
Cherry Bourbon Pie
Hello friends! Today it’s all about pie and summertime essential. And no, I’m not talking about bathing suits. Even though I should probably be thinking more about bathing suit season and less about pie. But this cherry bourbon pie is one you would not want to miss.
There is nothing I love more than a kitchen that smells like you’ve been baking. This easy and delicious Cherry Pie will make that happen! It smells so good as it bakes in the oven. Your entire house will smell just divine. I don’t know about you but a pie just tastes better when it’s made from scratch. I have many pie recipes that I have shared with you from Pear Apple Pie to Homemade Strawberry Pie and so many more. But there is just something about this Cherry Pie. It may be one of my top favorites, especially in the summer.
For those who are scared or intimidated by pie making, I’m here today to tell you it’s not as hard as it looks. I promise. You don’t need to head to the bakery for a pie this time.
With the summer months ahead of us, this is the perfect pie to have on your counter. You can stop at your local farmers’ market to grab a carton of fresh cherries and they will work perfectly if you want to opt away from frozen. If you need a last-minute dessert to bring or you just want to treat your family to a pie after dinner, this is always my go-to.
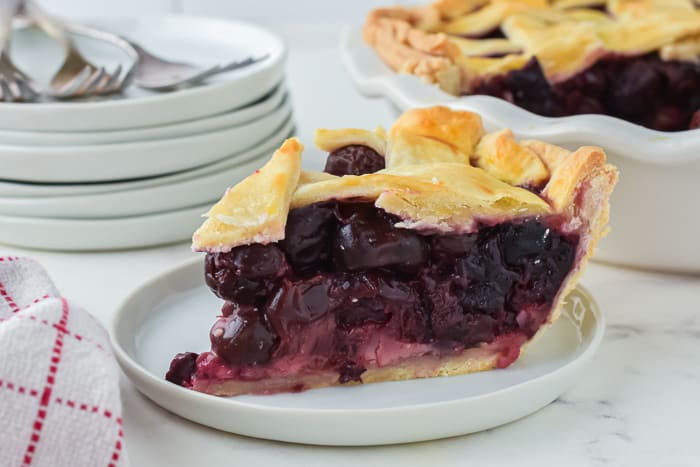
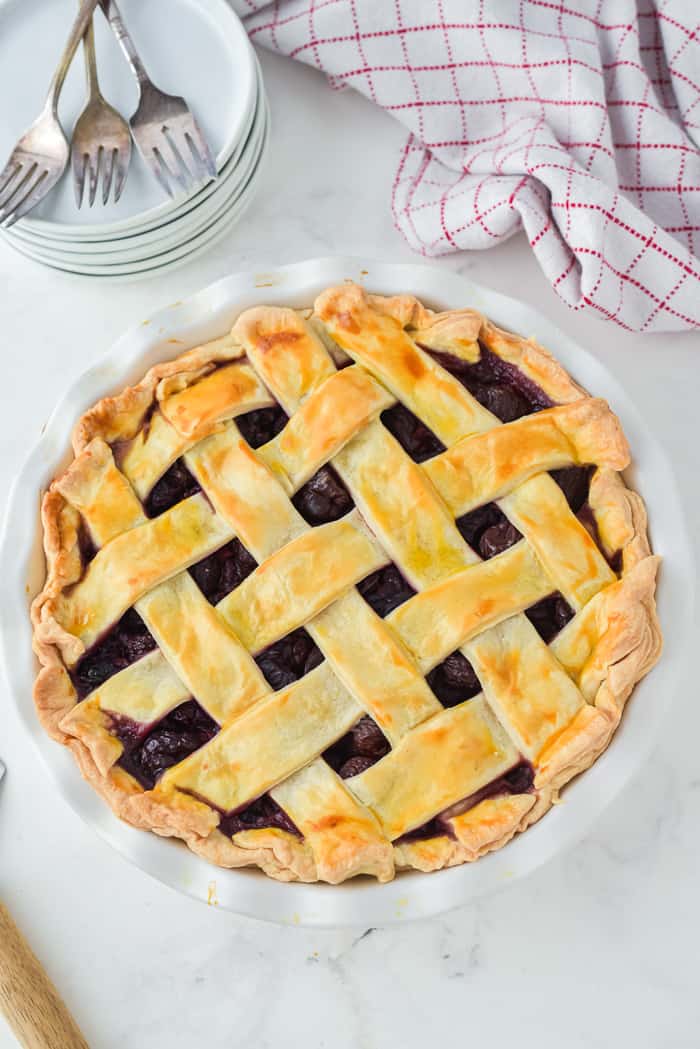
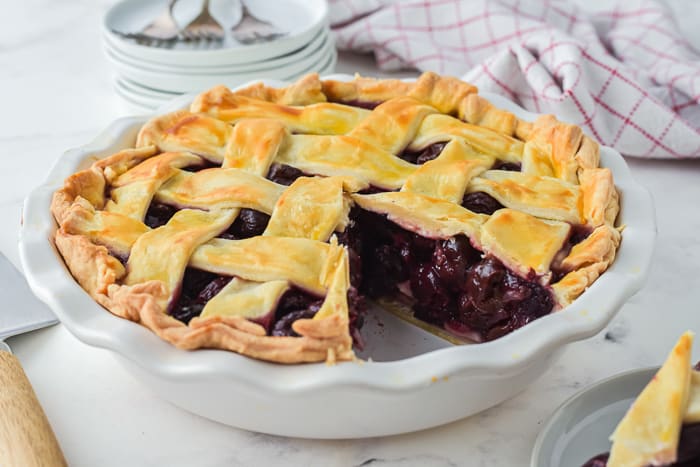
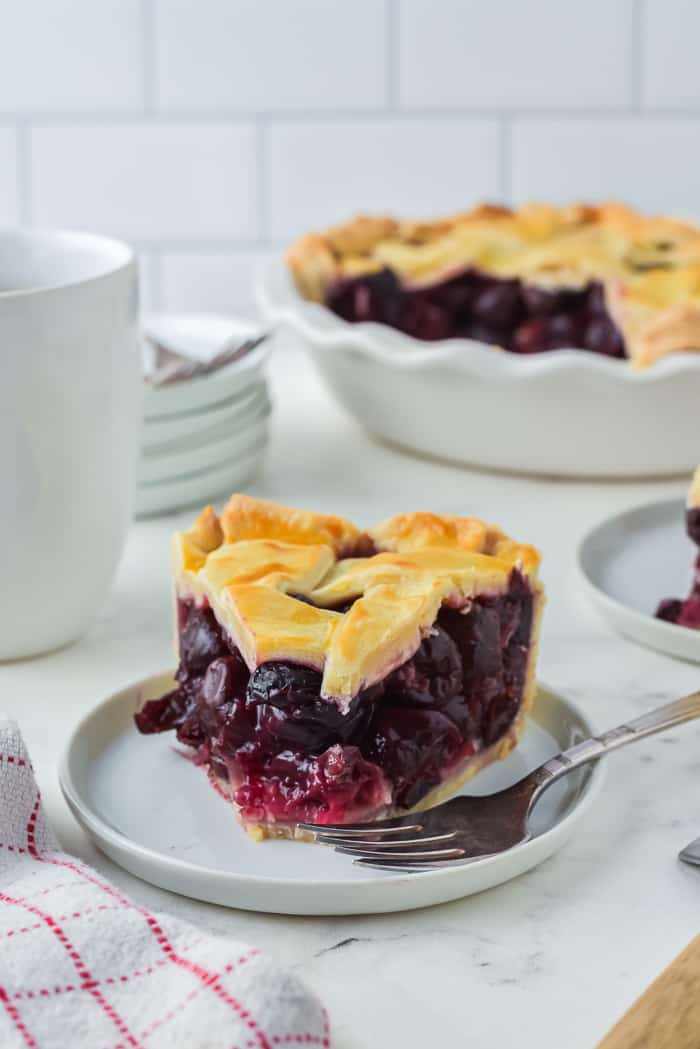
The homemade cherry pie filling infused with bourbon is baked inside a buttery and flaky crust. It is the perfect combination of sweet, tart, and delicious pie.
Let’s walk through how to make this recipe. Skip to the end if you prefer just the recipe.
We start with making the crust.

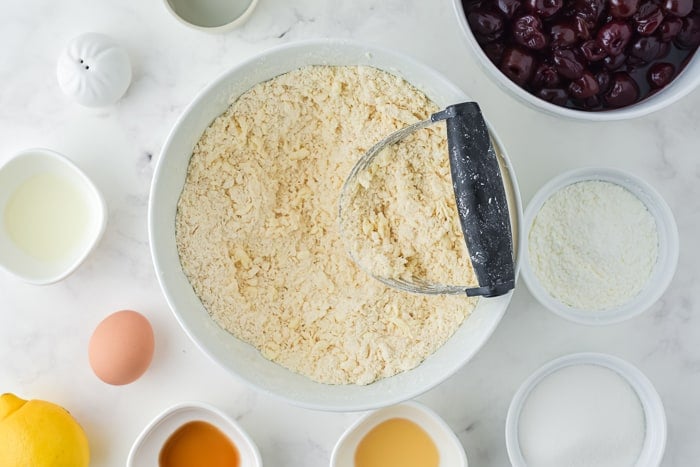
The key to flaky pie crust is using cold butter and cutting it into the flour with a pastry cutter (or a fork or your fingers).
Then add the ice-cold water to the mixture and mix until the dough starts to come together.
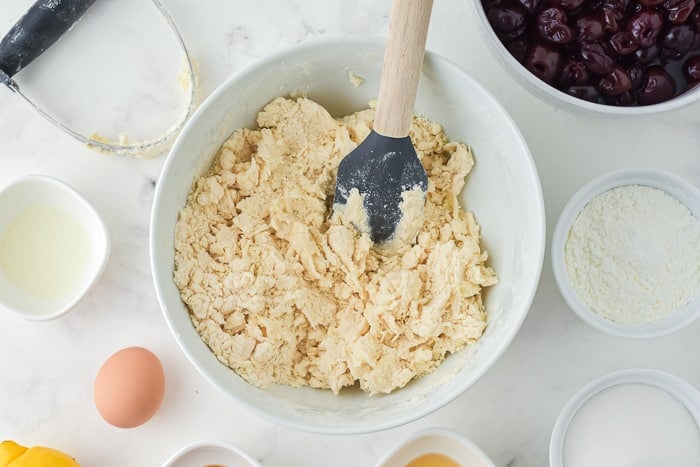
Use your hands to bring it all together into a dough ball.
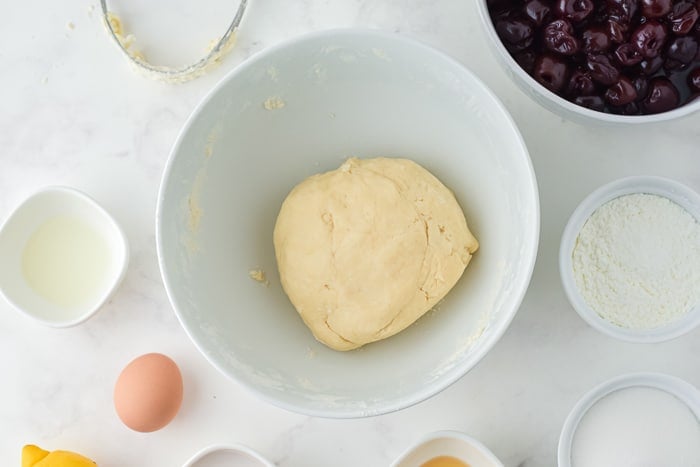
We will divide this dough into two and chill. In the meantime make the pie filling.
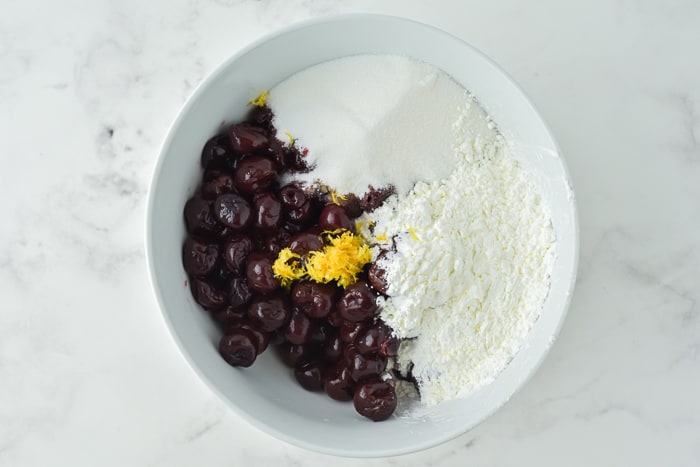
Toss the cherries with the rest of the filling ingredients. Don’t forget the bourbon!! Let the filling sit for 10-20 minutes for the flavors to blend.
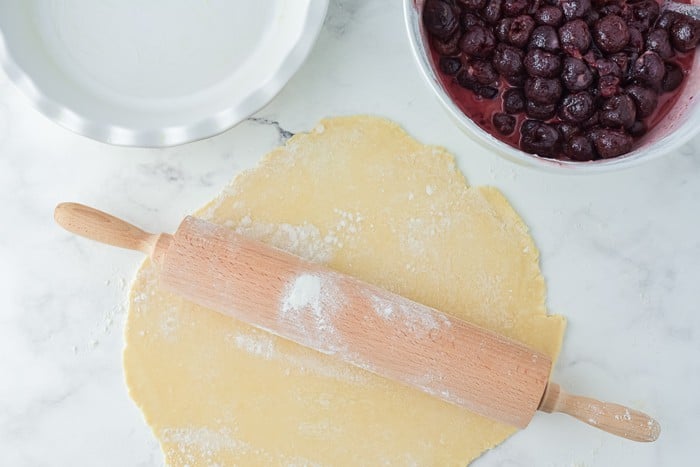
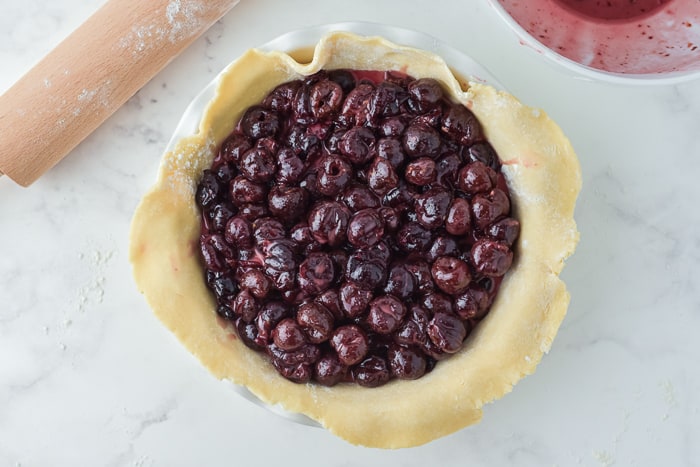
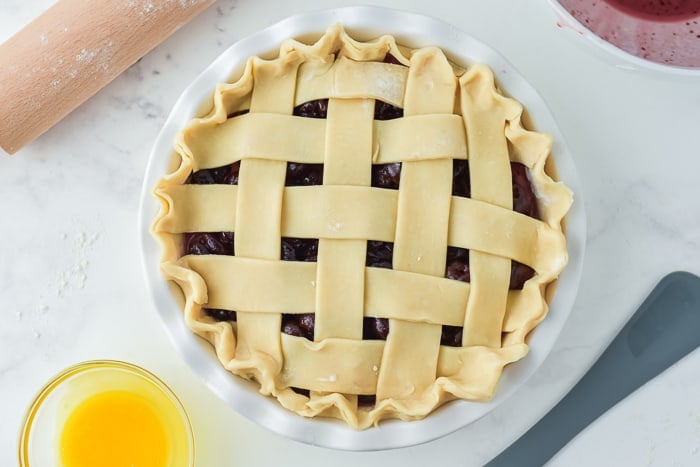
Roll out the dough and transfer it to a pie dish. Spoon in the cherry filling.
Next, roll out your other crust. You can either do a double crust or make some designs. I did a lattice for this because it is fun!
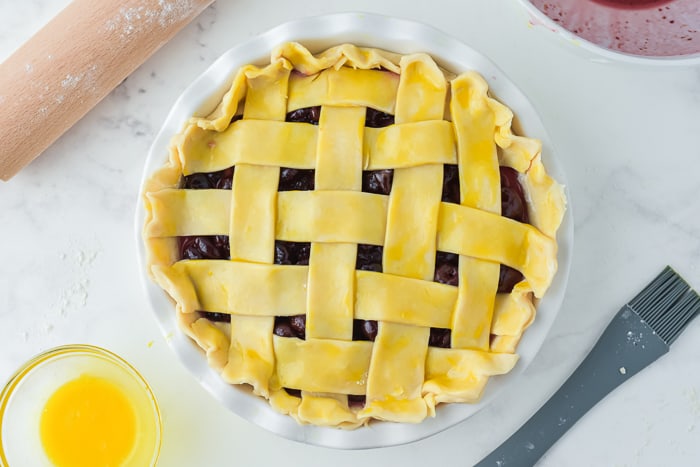
Brush the top of the pie with an egg wash and sprinkle with turbinado sugar.
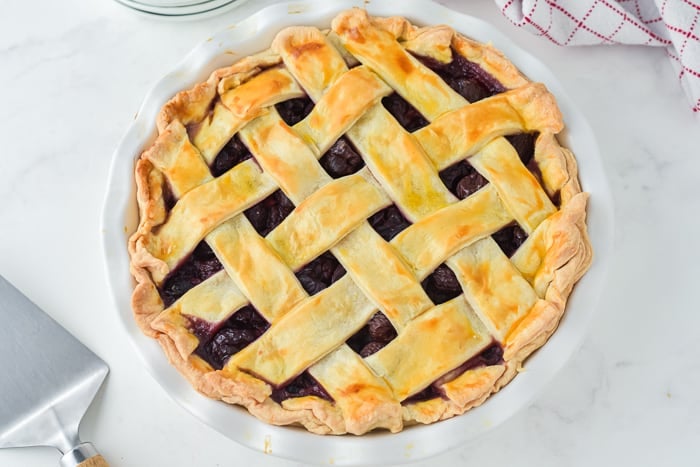
Time to bake!
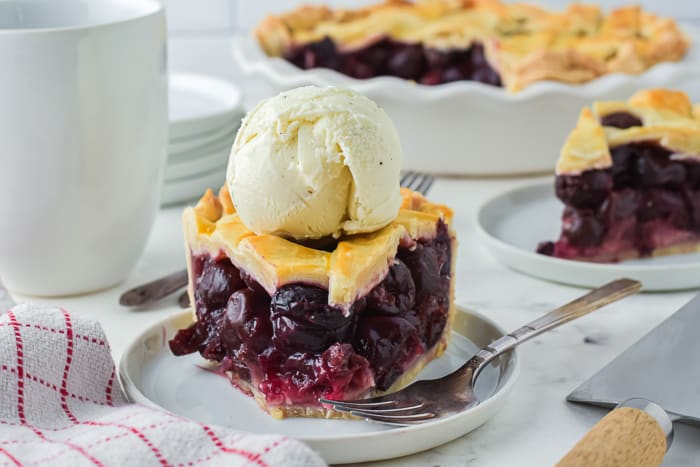
Serve your Cherry Pie with a spoonful of cool whip on the top or a side of vanilla ice cream for an added touch. Or just serve it alone! It’s delicious either way.
While I did include a few notes in the recipe below to help this pie be a success, a frequently asked question is about the pie crust. Many want to know; Can I use a store-bought crust to save time? I know it might be easier to grab a store-bought pie crust but I promise you, taking the extra steps and baking a homemade pie crust really makes a pie. You can of course use store-bought because we all need a shortcut sometimes.
More Cherry Desserts to try
- Rustic Cherry Galette
- Cherry Plum Hazelnut Galette
- Cherry Hand Pies
- Instant Pot Cherry Cheesecake
- Cherry Lime Cheesecake Bars
Cherry Pie Recipe
An easy and delicious cherry pie recipe.
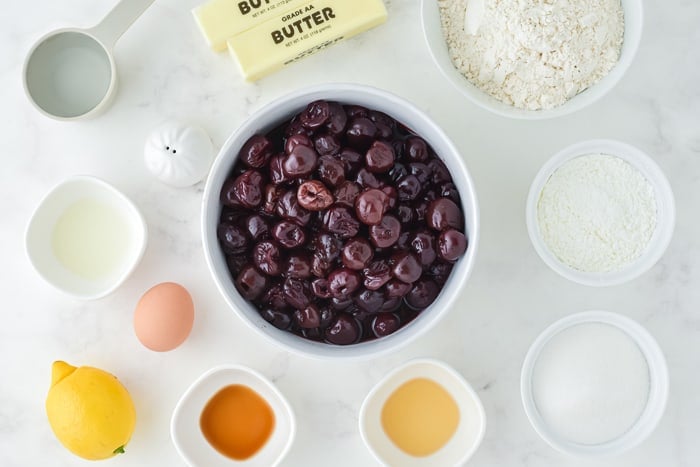
Ingredients
For the Pie Crust:
- 2 ½ cups all-purpose flour
- ½ teaspoon salt
- 1 cup (2 sticks) unsalted butter, chilled and diced
- ½ cup water, ice cold
For the Pie Filling:
- 5 cups cherries, pitted (if using frozen cherries, please thaw completely and drain)
- ¾ cup granulated sugar
- ⅔ cup cornstarch
- 1 tablespoon lemon juice
- zest from one lemon
- 1 teaspoon vanilla extract
- a dash of bourbon
- 1 tablespoon butter, cut into small pieces
- 1 large egg yolk, beaten
Instructions
For the Pie Crust:
- Place the flour and salt into a large bowl. Using a pastry cutter or pinching really quickly with your fingers, combine the cold butter with the flour until the mixture resembles coarse sand.
- Add the water, 2 tbsp at a time, stirring with a spatula. The mixture should hold together when pressed.
- Transfer to a floured surface and, working quickly, fold the dough into itself until it’s holding together and not sticky. Divide the dough into two equal halves.
- Cover each with plastic wrap and refrigerate for 2 hours.
- Take it out of the fridge and transfer it to a floured surface. Using a rolling pin, roll out one disc of crust into ⅛” thick each round circle.
- Transfer to the bottom of a 9x2-inch pie pan. Store in the refrigerator while making the filling.
- Roll out the remaining pie disc and use it for decorations or to make a double-crusted pie.
For the Pie Filling:
- Preheat the oven to 350 degrees.
- In a bowl, combine the cherries, sugar, cornstarch, lemon juice, lemon zest, vanilla, and bourbon. Let sit for at least 10 minutes.
- Transfer the filling to the prepared pie crust. You do not need to add the liquid from the fruit mixture.
- Dot the pie filling with the cut-up butter before applying the top crust.
- Use the other pie disk to create the decorations. Place on top, pressing the edges firmly.
- Brush with the egg yolk and bake in the oven for 25 minutes. Cover with aluminum foil and continue baking for 25 more minutes. The crust should be golden brown, and the filling should be bubbly and set.
Notes
- You can freeze the pie crust disks for up to 2 months.
- While you are making the filling store the pie crust in the refrigerator.
- Covering the pie mid-baking is what allows it enough time to fully cook while not burning the top.
- When preparing the filling, stir until the cornstarch is fully incorporated with the cherry juices.
Recommended Products
As an Amazon Associate and member of other affiliate programs, I earn from qualifying purchases.


Hi There! I made this recipe, but I noticed that in the pie filling section you have an ingredient listed, but you don’t mention where to use it. I ended up leaving it out because I really wasn’t sure what to do with it, and pies are not my standard baked good. Would you be able to advise what to do with the 1 tablespoon butter, cut into small pieces? It’s right above the egg yolk.
Having said that – leaving it out, pie turned out just fine and was very delicious! Thank you so much for sharing your recipe!
Barb, the butter goes on top of the pie filling and the egg yolk is for the egg wash.